Introduction
Escalation Triggers are based on an object's states. When the object enters the begin state, the trigger activates and waits for a set period. If the object reaches an end state during this time, the trigger is canceled. If not, the associated actions are carried out.
For example, if an item is marked as "Awaiting Receipt" and you need to remind stakeholders that the item has been pending for 14 days, you can use this trigger. Set "Awaiting Receipt" as the begin state and the time period to 14 days. The trigger will be canceled if the item's state changes to "Received" within those 14 days.
Configure an Escalation Trigger
- Name: enter a name for your escalation trigger
- Description: Provide a brief description of your trigger
- Type: Select Escalation as the type
- Order: Triggers can be executed in a designated sequence. Those with the lowest order number are executed first. If an order is not specified, triggers default to an order number of 0.
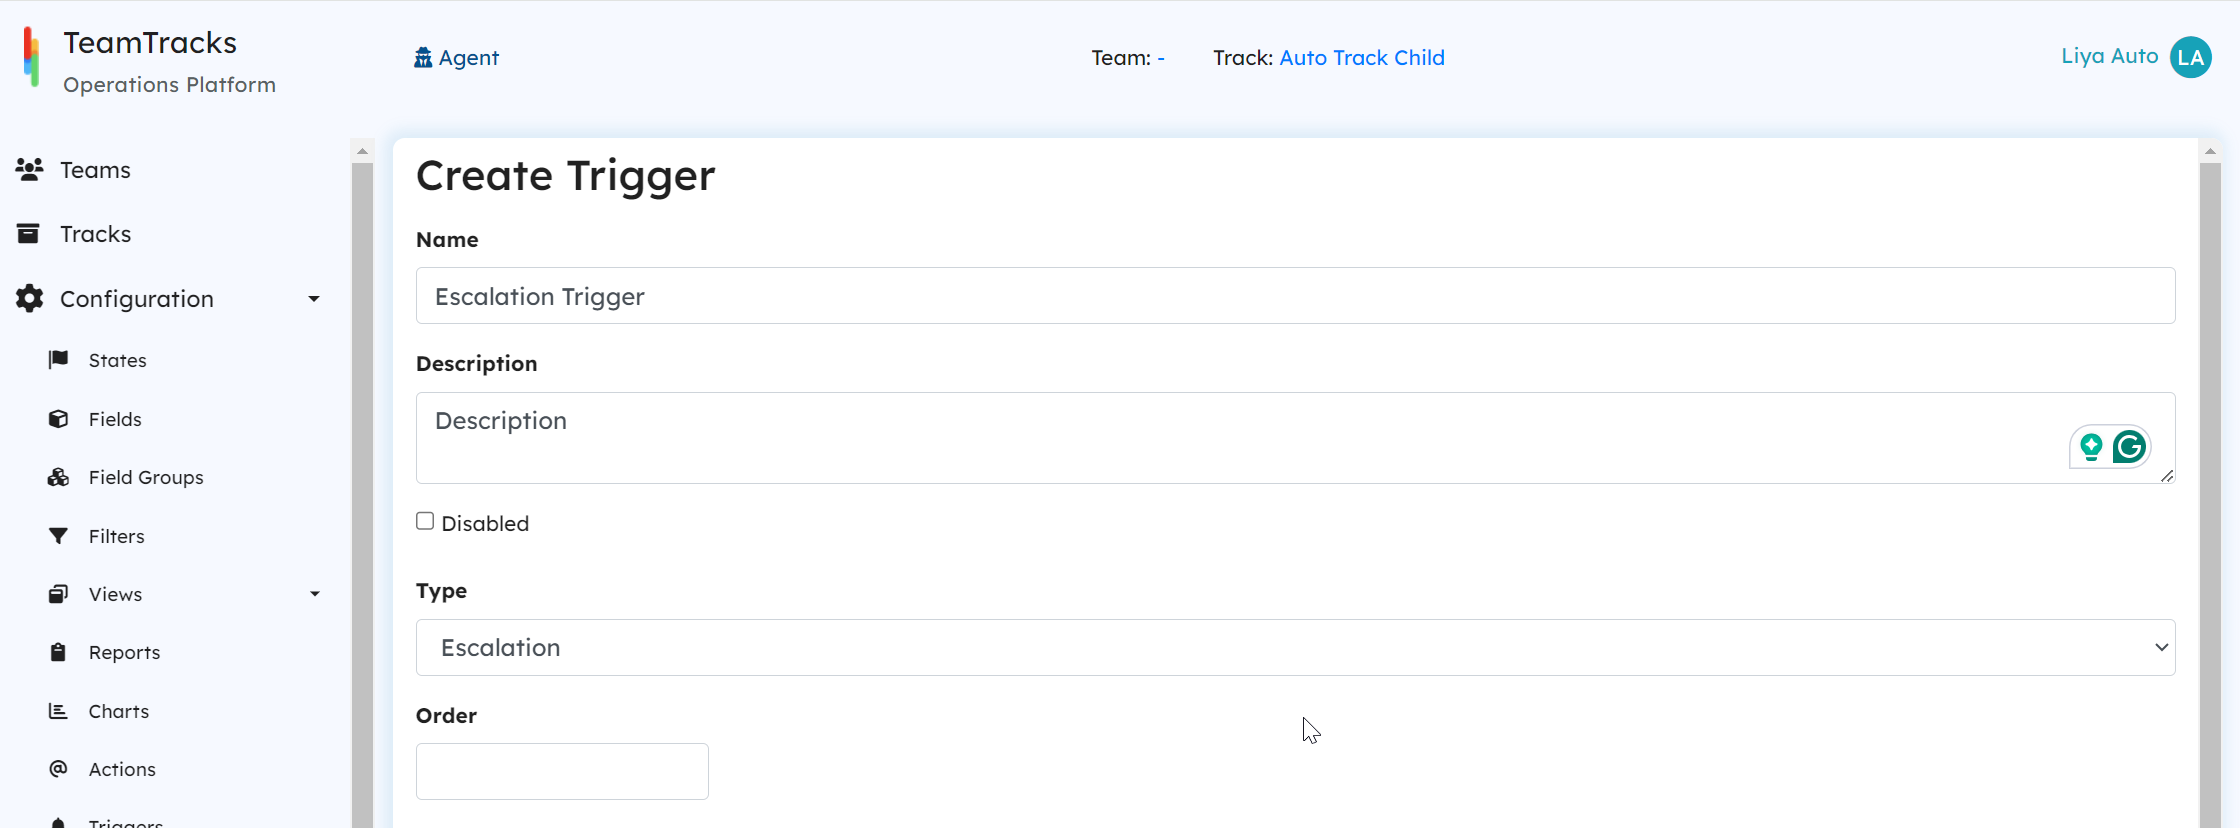 Admin Portal: Create Trigger Screen
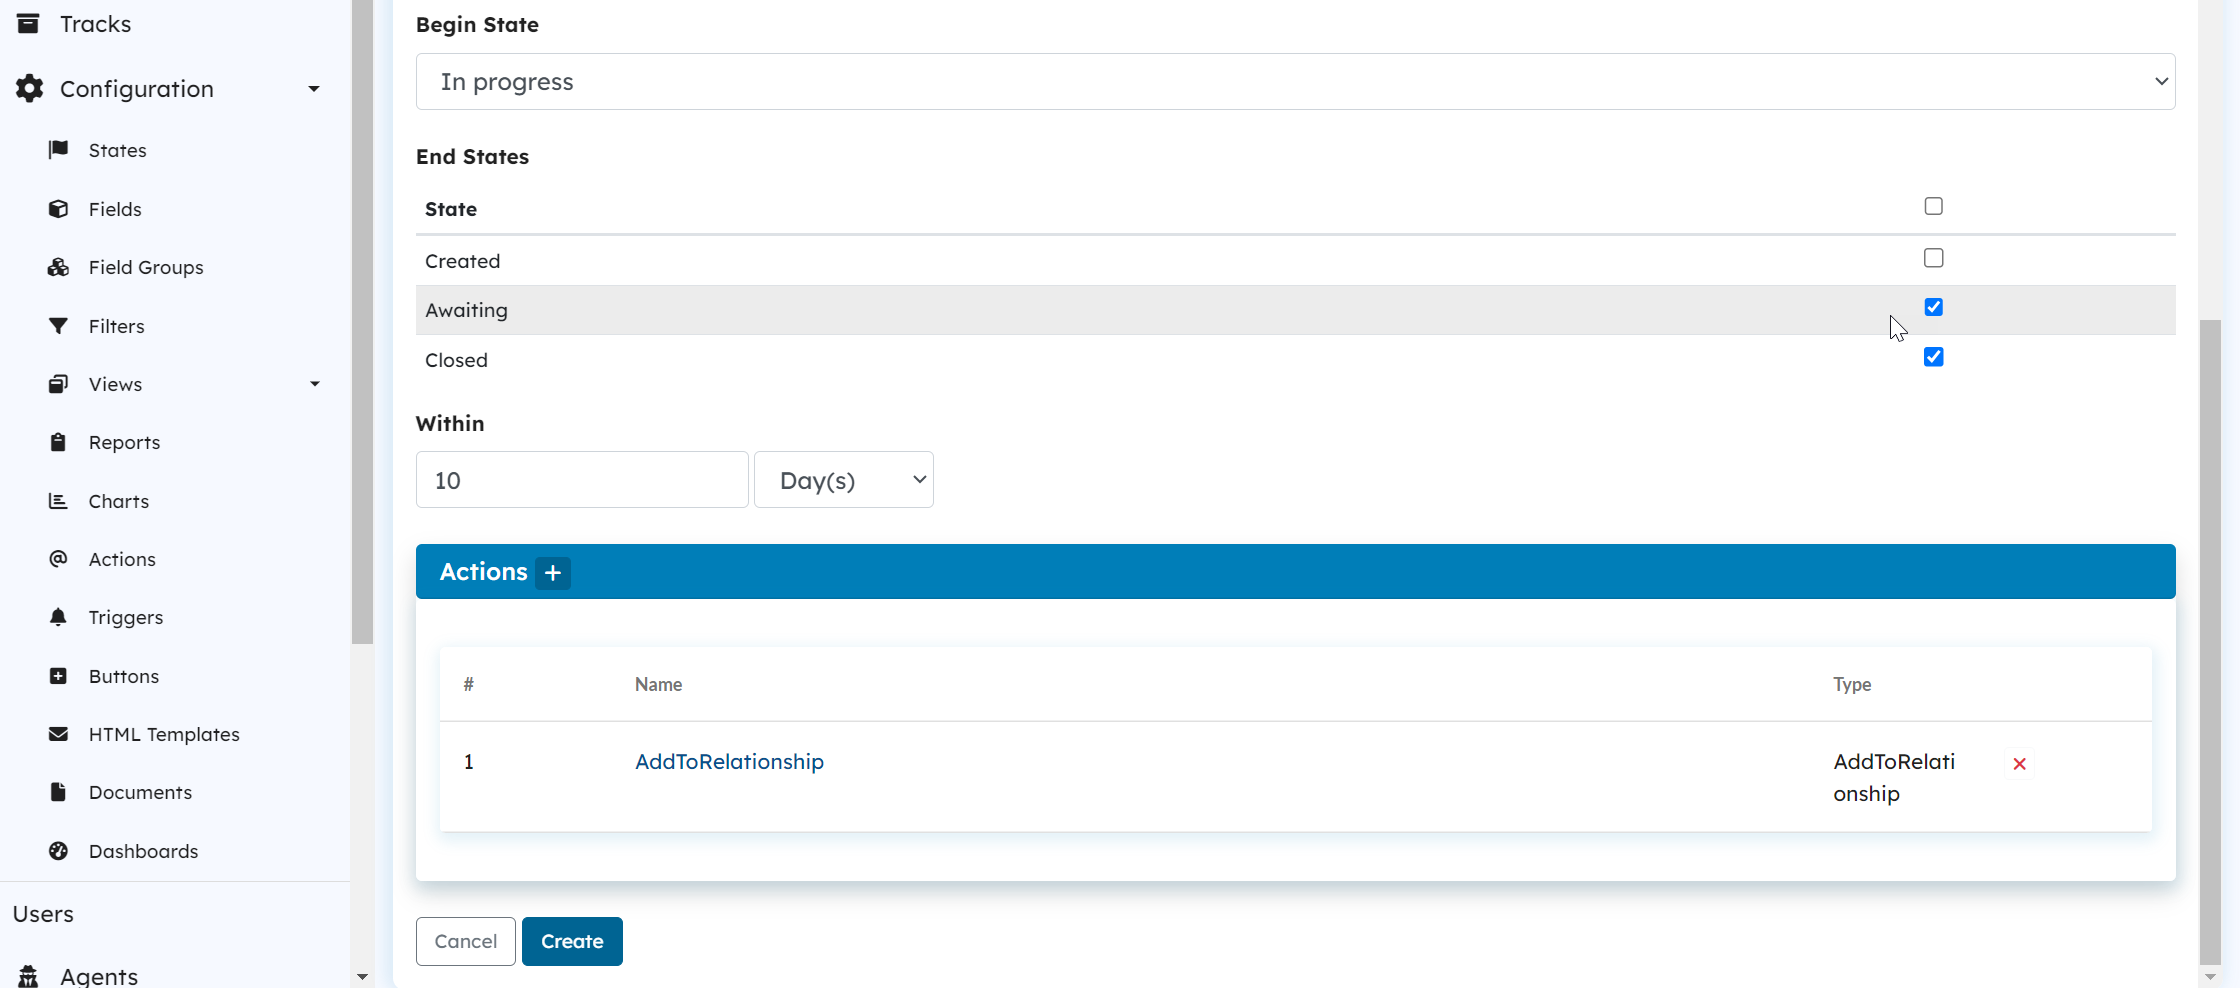
- Begin State: Select the state from the dropdown at which the trigger should be activated.
- End States: Select the end states where the activated trigger will be discarded. Multiple states may be selected as end states.
- Within: The "Within" parameter sets the timer for how long the trigger will wait before deciding whether to execute the actions or cancel itself. This time can be defined in minutes, hours, days, or weeks.
- Select the Actions to be executed using the + icon.
- Click on Create.
 Admin Portal: Create Trigger Screen
The history logs every detail concerning the objects, so when an escalation trigger is activated, it records an entry, indicating the scheduled time for the trigger to fire.
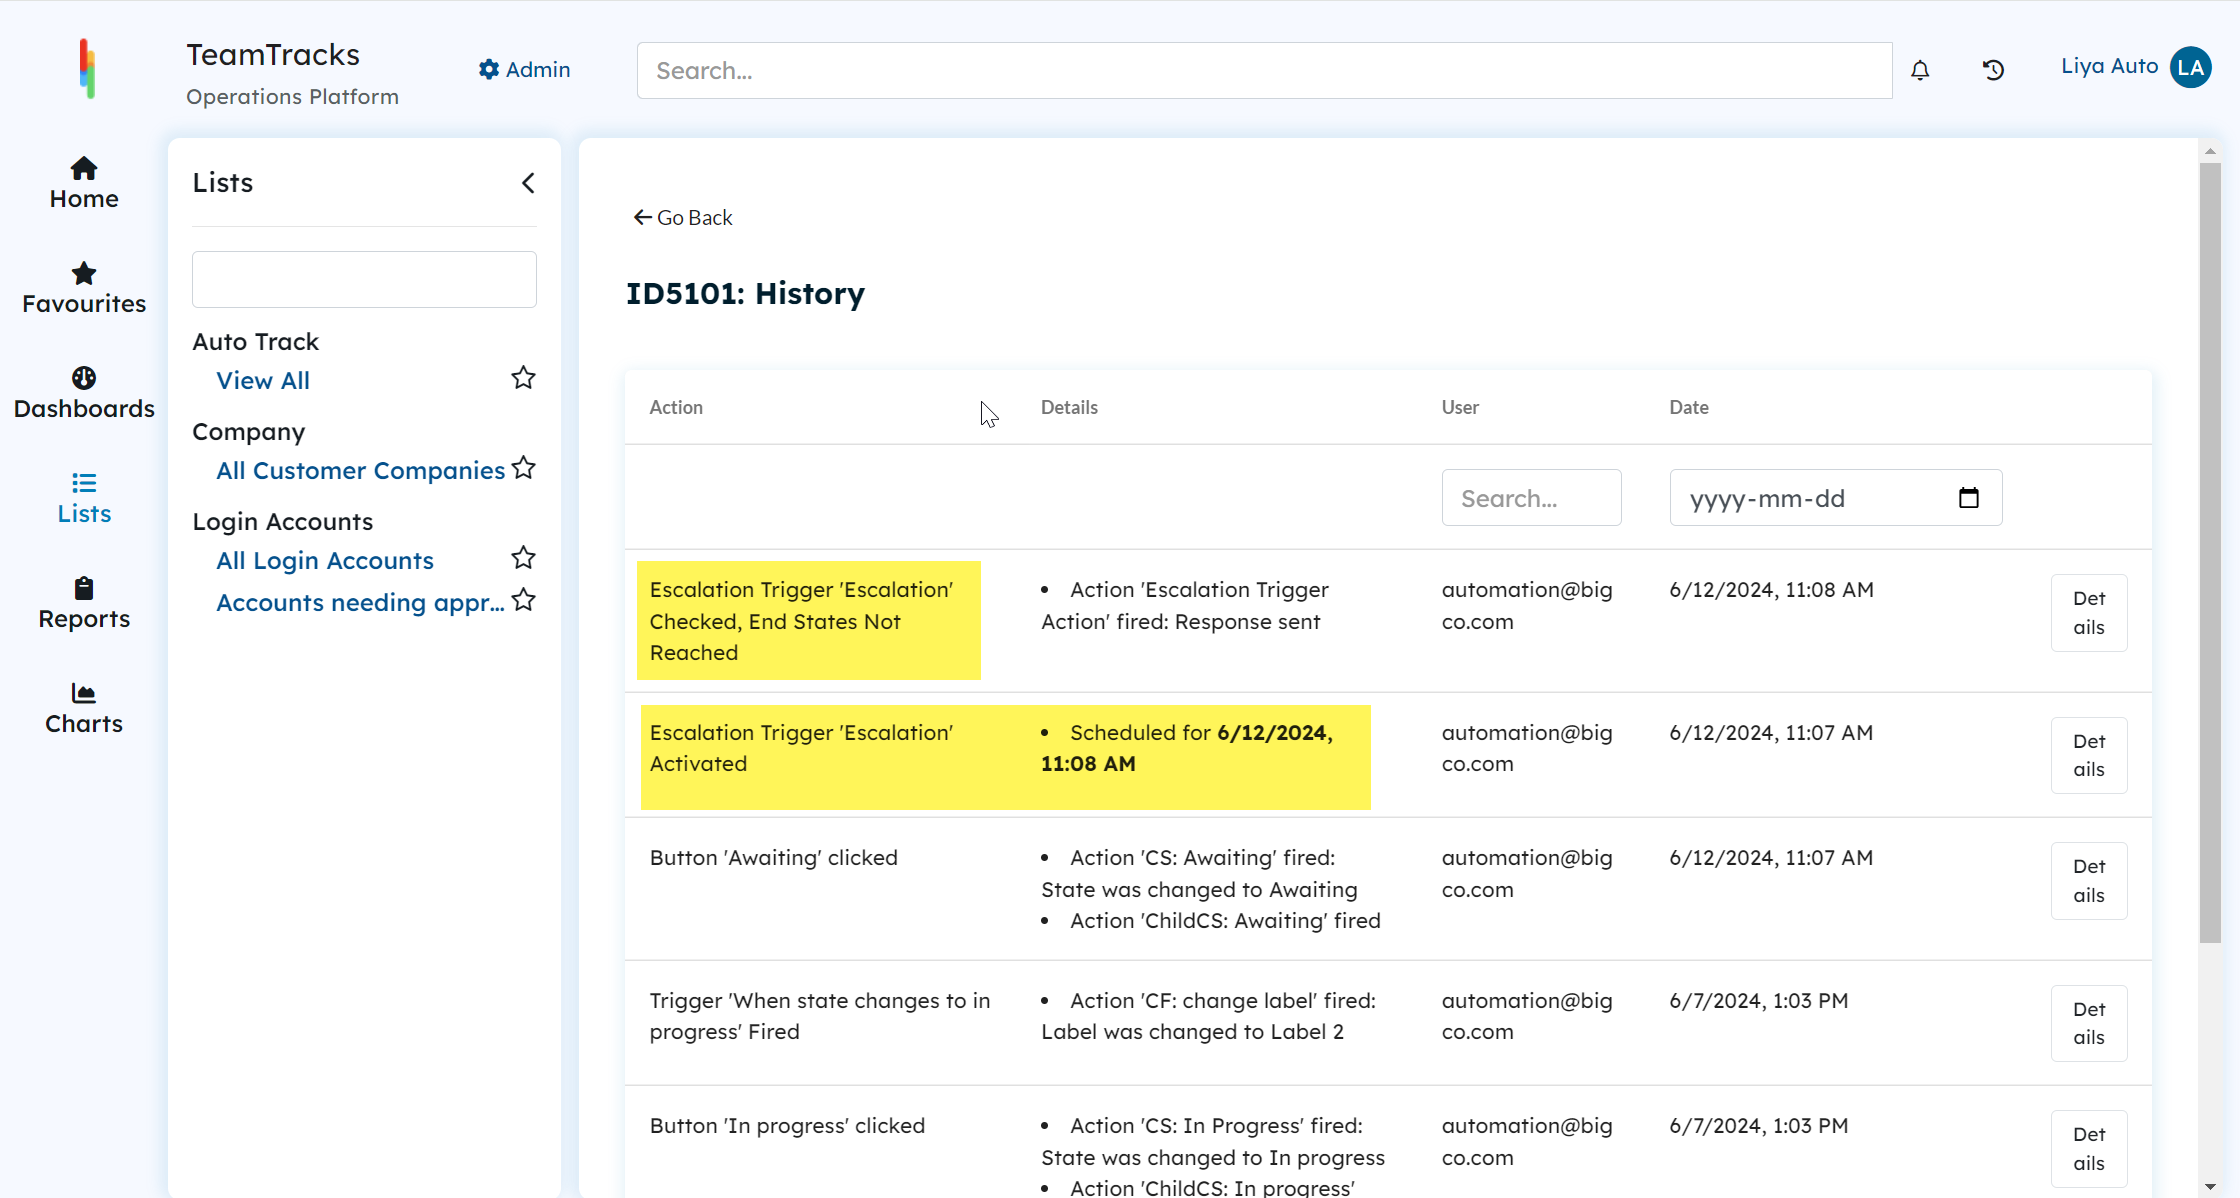 Agent Portal: Object History