Introduction
Rule-based triggers are created using custom rules that rely on both custom and system-generated fields. These triggers can be activated in different ways, such as when an object is edited or deleted. When a trigger is activated, the system checks if the conditions you have set are met. If they are, the linked actions will be carried out.
For instance, if you want to send an email when a specific text field is edited, you can set up a rule-based trigger that activates when the object is edited. The trigger will check if that particular field has changed, and if it has, the email action will be triggered.
Configure a Rule Based Trigger
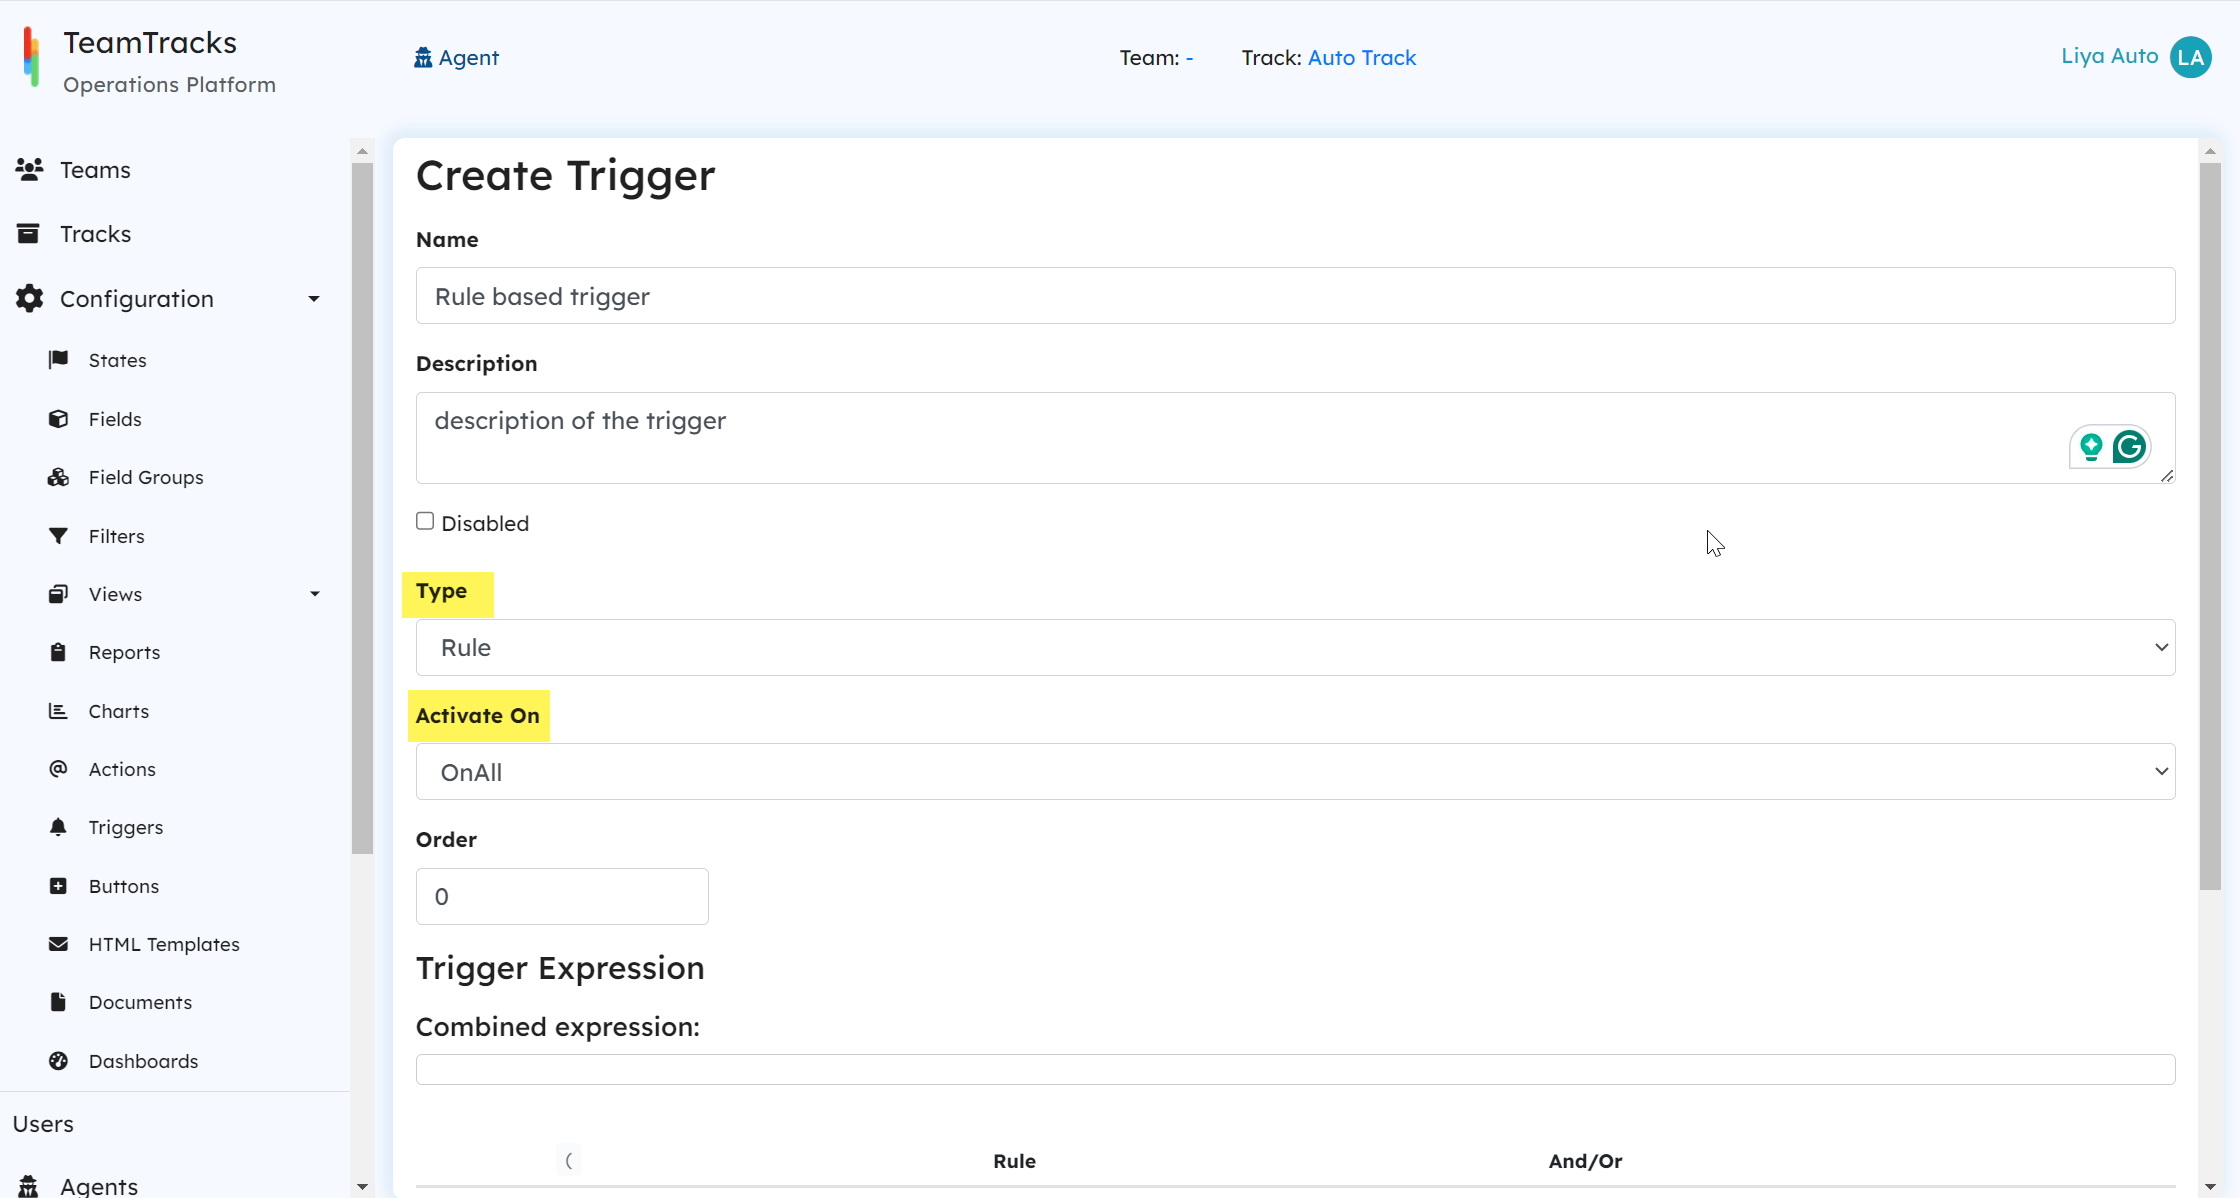
Name: enter a name for your trigger
Description: Provide a brief description of your trigger
Type: Select Rule as the type.
Activate On: Select when you want the trigger to activate. Based on your choice, the trigger will activate whenever the object goes through that action. For example, if you select OnCreate, the trigger will activate whenever a new object is created.
The available options are: (expand each section to see specifics)
OnCreate
Choose "OnCreate" if you want to automate actions whenever a new object is created in the system. For example, you could set up an email notification to be sent to the admin team when a new object is created.
This rule trigger works for objects created through a list, an embedded list, or the "Create Object" action. However, if the object is created as part of a split event, the "OnCreate" trigger won’t activate. In that case, you can use the "OnSplit" option instead.
OnEdit
Choose "OnEdit" if you want to automatically perform actions when an object is being edited. For example, if you want to change the object's status to "Received" and send an email to the client when the "Receiving Date" is updated, you can use the OnEdit trigger for this.
Here are some examples where the OnEdit trigger will activate:
Editing the object through Edit Views.
Editing the object using custom button clicks.
Adding a new child to the object using a relationship (embedded list).
Editing a child from an embedded list using Edit View.
Deleting a child from an embedded list.
Splitting an object is also considered an edit for the original object. However, the newly created object from the split will trigger the OnSplit rule instead of OnEdit.
Scheduled triggers on an object
While the OnEdit trigger activates for most changes made to an object, there are some exceptions where it won’t activate. This is usually because specific activate on options are available for those types of modifications.
Here are some examples where the OnEdit trigger won't activate:
Sending or receiving emails within the object.
Adding a new comment to the conversations.
OnDelete
Choose OnDelete if you want to perform specific actions when an object is deleted.
OnAll
Choose the OnAll trigger if you want actions to happen when an object is created, edited, or deleted. This trigger combines the functions of OnCreate, OnEdit, and OnDelete, so it covers all these events in one, making it a simple option for handling changes to an object in any of these situations.
OnEmailReceived
The OnEmailReceived trigger activates when an email is received for the object. However, this is a legacy trigger. The OnNewResponse trigger offers enhanced functionality, as it treats all received emails as "New Responses," making it a more versatile option.
OnNewResponse
This trigger activates when a new comment is added to the object. For example, if a client adds a comment and you want to notify the responsible agent, you can use this trigger.
New entries can be made to comments in several ways:
Manually
Through emails received on the object
Using the actions (AddConversationResponse and Email)
The OnNewResponse trigger will activate whenever a new entry is added to the comments, except for when actions are used.
OnSplit
The OnSplit trigger is used for a new object created during a split event. Since objects created through a split event don’t trigger OnCreate, you can use OnSplit instead. For the source object involved in the split, the event can trigger an OnEdit.
Order: Triggers can be executed in a designated sequence. Those with the lowest order number are executed first. If an order is not specified, triggers default to an order number of 0. This is the trigger evaluation order for all triggers in this track. If two triggers have the same order, the precedence is determined by date created in ascending order.
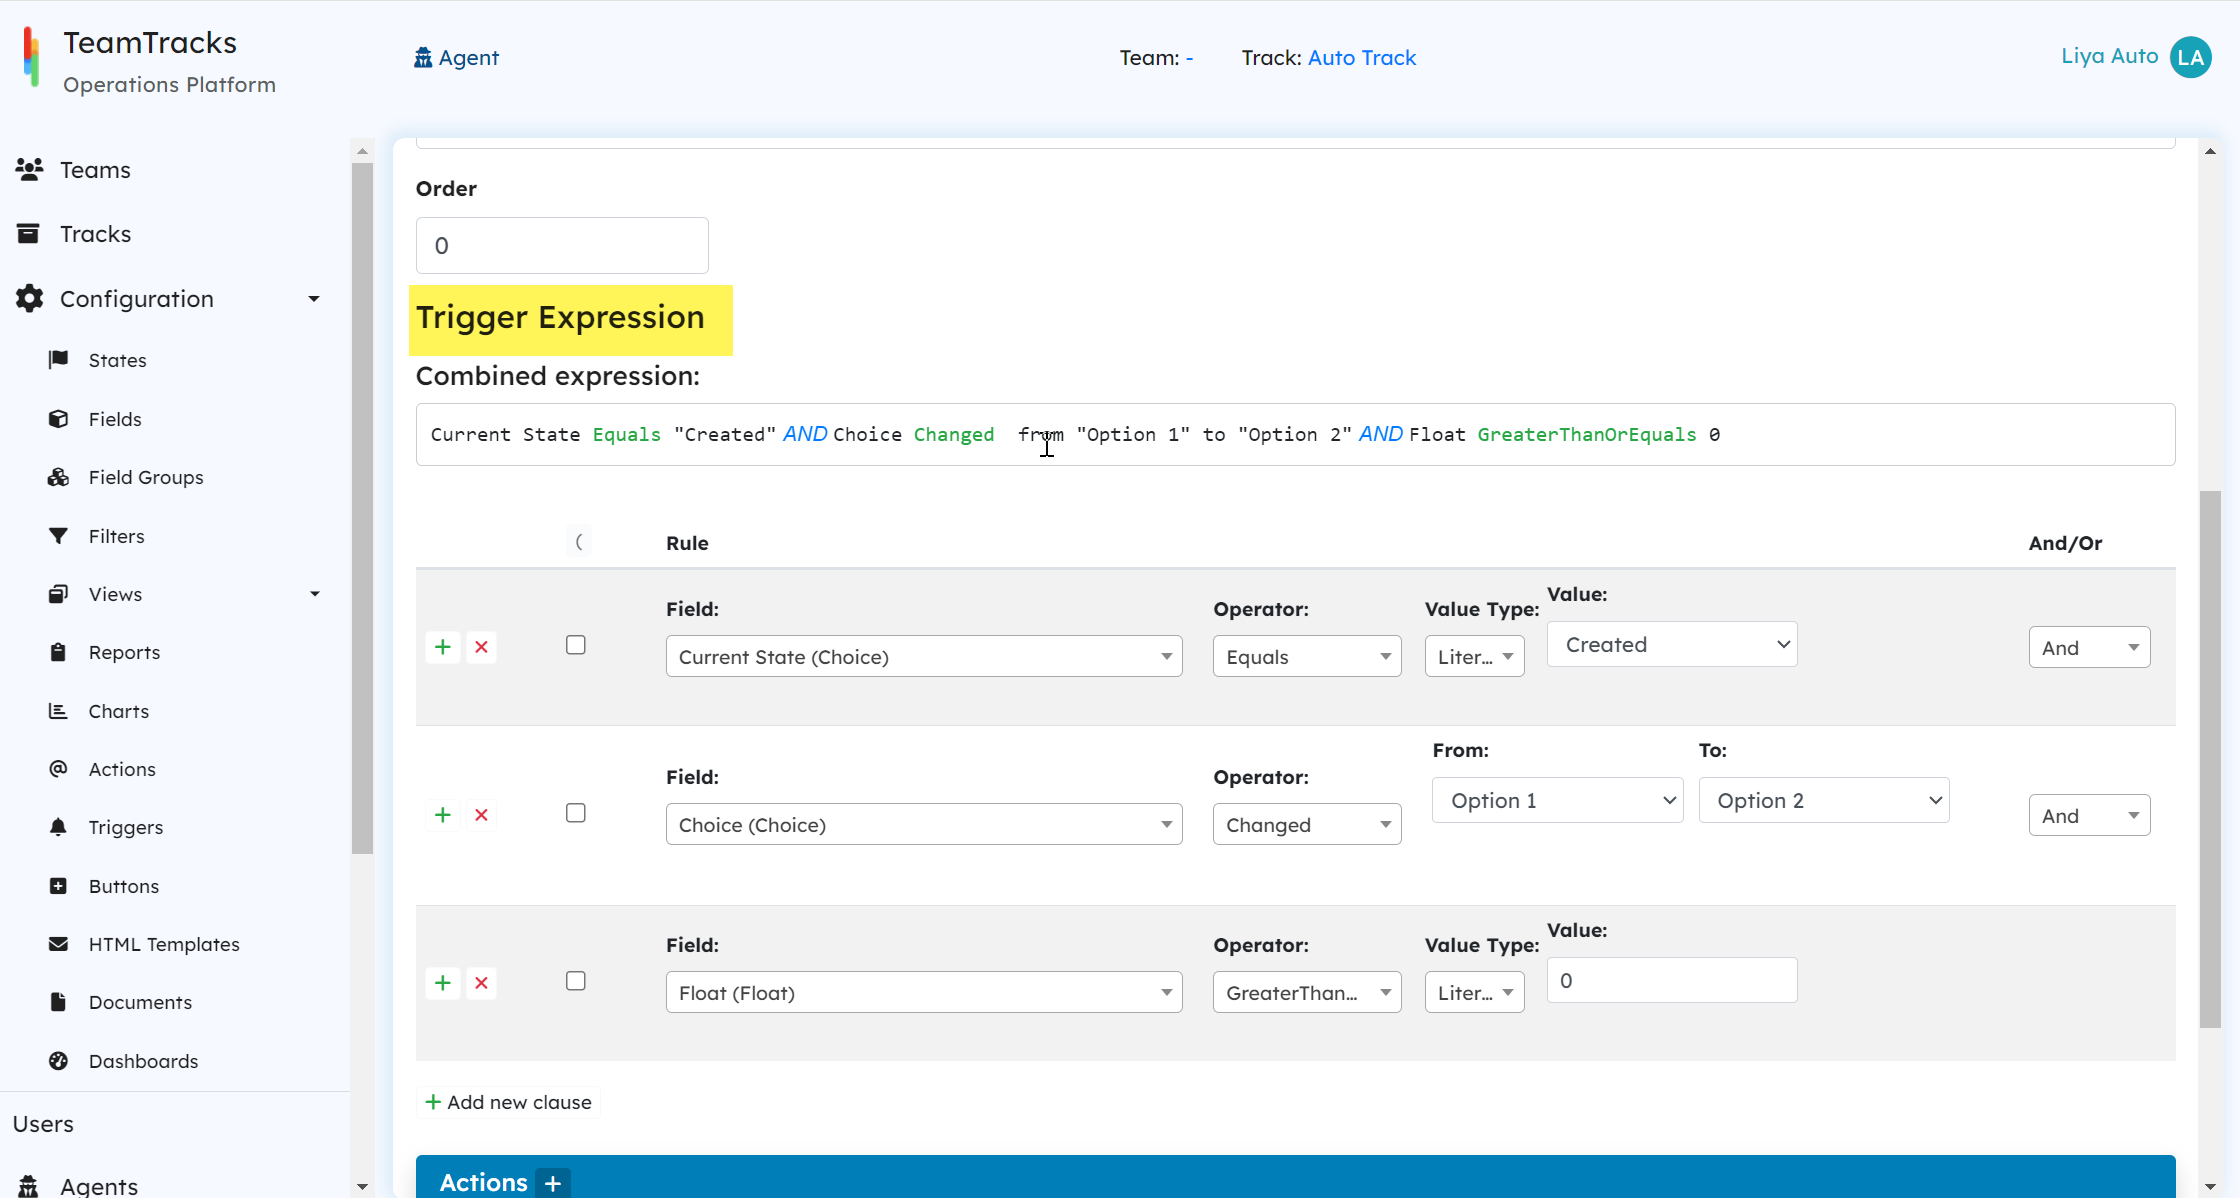
The trigger expression is where you set the rules that need to be met for the associated actions to be executed. These rules are defined using the custom and system-generated fields available in the track. You can choose the appropriate operators and values for these rules based on the chosen fields. Additionally, it is possible to construct complex and nested conditions using 'And/Or' logic operators and parentheses.
Click the + icon to add a new clause to the expression.
The combined expression creates a Boolean expression that is easier to read and understand based on the defined rules. It simplifies complex conditions, making it easier to see and understand them.
Admin Portal: Trigger Configuration
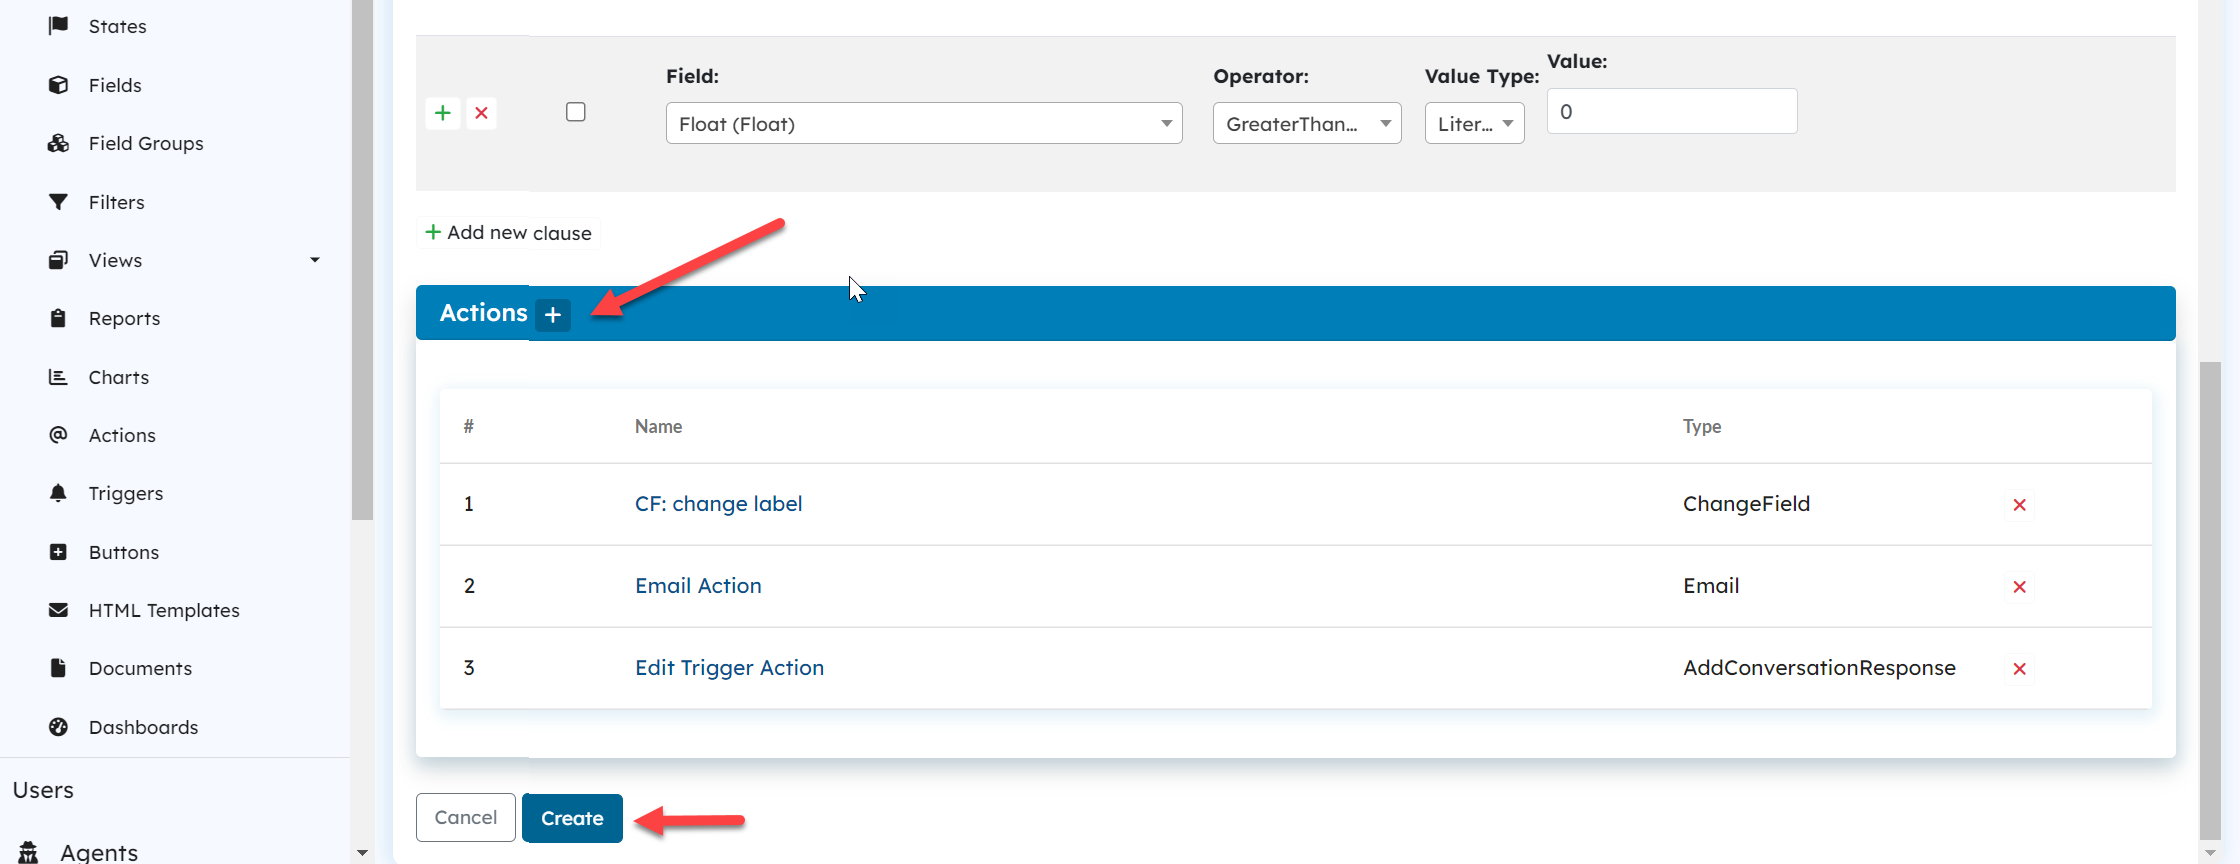
Actions
When the rules are met, the specified actions are executed. Click the + icon to add the available actions to the trigger.
Admin Portal: Trigger Configuration
Object History
The object history is where you can check if a trigger has been activated. Each time a trigger is fired, an entry is made in the history, showing details like the trigger name and the actions executed as part of that trigger.
.png "image(28).png")
Agent Portal: Object History
A Case
Imagine a workflow for handling returns with a Return Status field that has three options: Requested, Approved, and Rejected. We want to set up triggers to automatically update the Order State based on the return status:

To set up these triggers, follow these steps:
Trigger Type: Select 'Rule' as the trigger type.
Activate On: Choose 'OnEdit' as the activation option.
Trigger Expression: Define the expression so that it activates when the Return Status field changes from any value (leave the "From" field empty) to the desired option.
Action Section: Attach the Change State action to each trigger. This will change the Order State to the appropriate state.
Trigger 1: If the Return Status is updated to Requested, change the Order State to Awaiting Review.
.png "image(33).png")
Trigger 2: If the Return Status is updated to Approved, change the Order State to Return Authorized.
.png "image(31).png")
Trigger 3: If the Return Status is updated to Rejected, change the Order State to Return Denied.
.png "image(32).png")
With this setup, whenever the return status changes, the order state will automatically update to reflect the current status of the return process.