Admin Interface is where all the workflows and elements visible in the agent and client portals are configured. Everything on these portals can be built from scratch to meet your specific requirements. In this article, you will get a glimpse of the B2B RMA Template configuration.
Roles and Permissions:
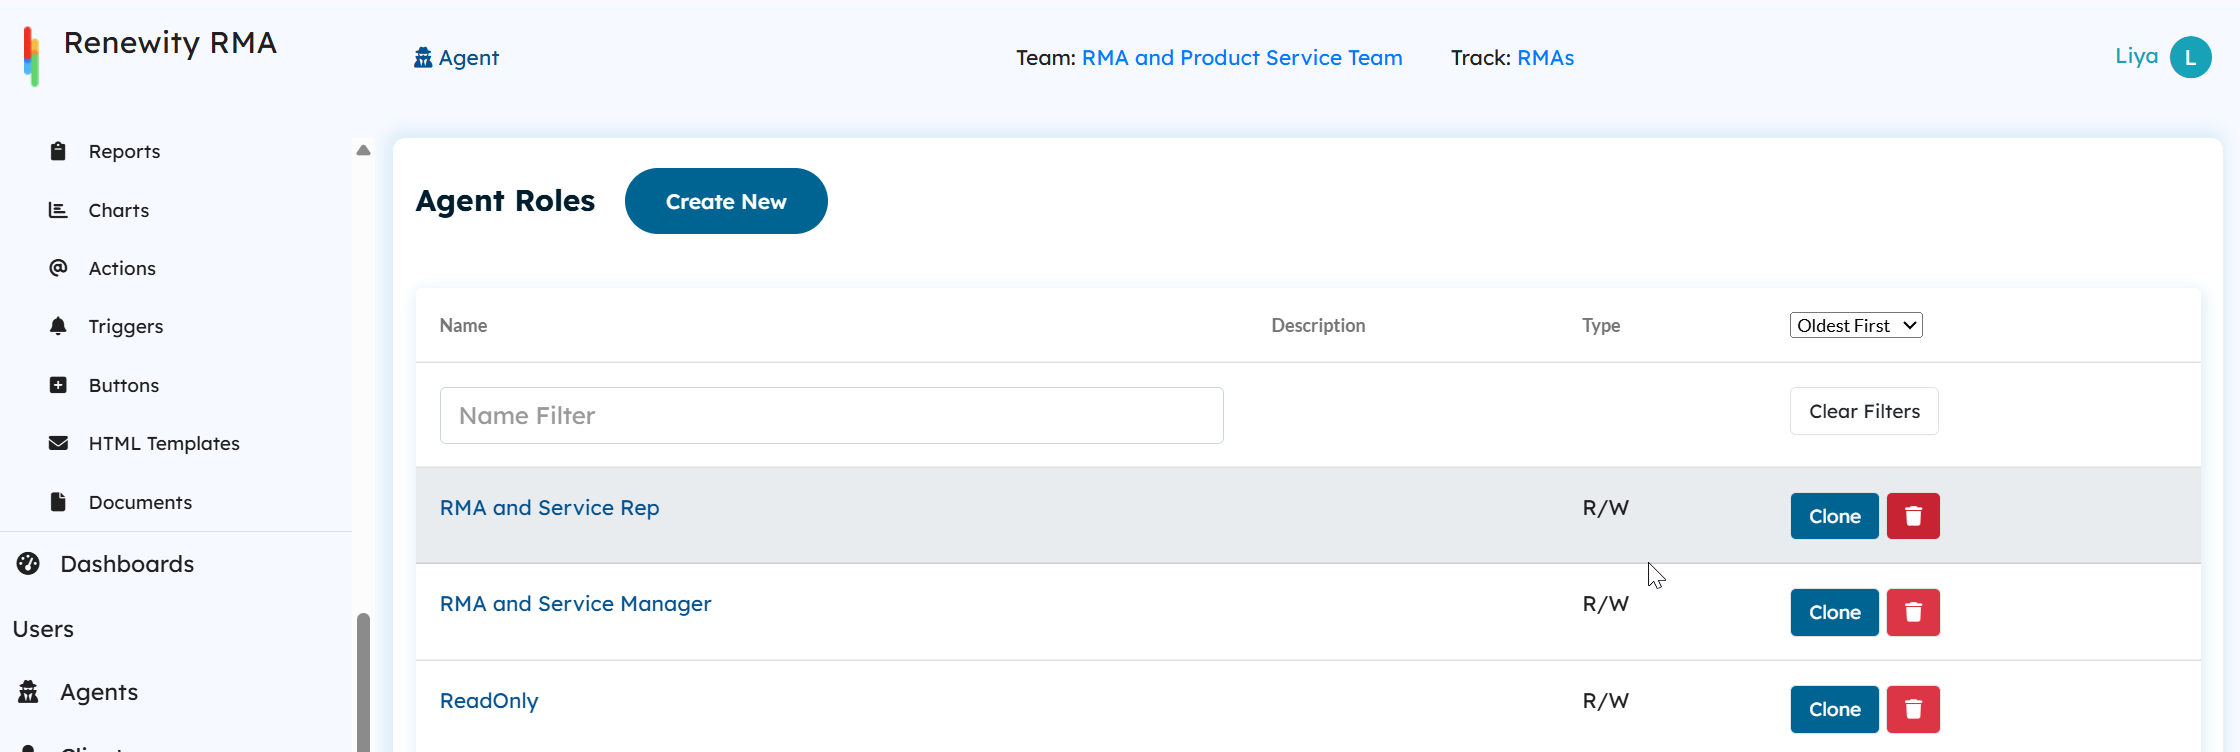
Agent Roles
Agent roles allow access to the agent portal, and what users can see there depends on their role permissions. In this template, there are two main agent roles: RMA Service Rep and RMA and Service Manager, along with a Read-Only Agent role.
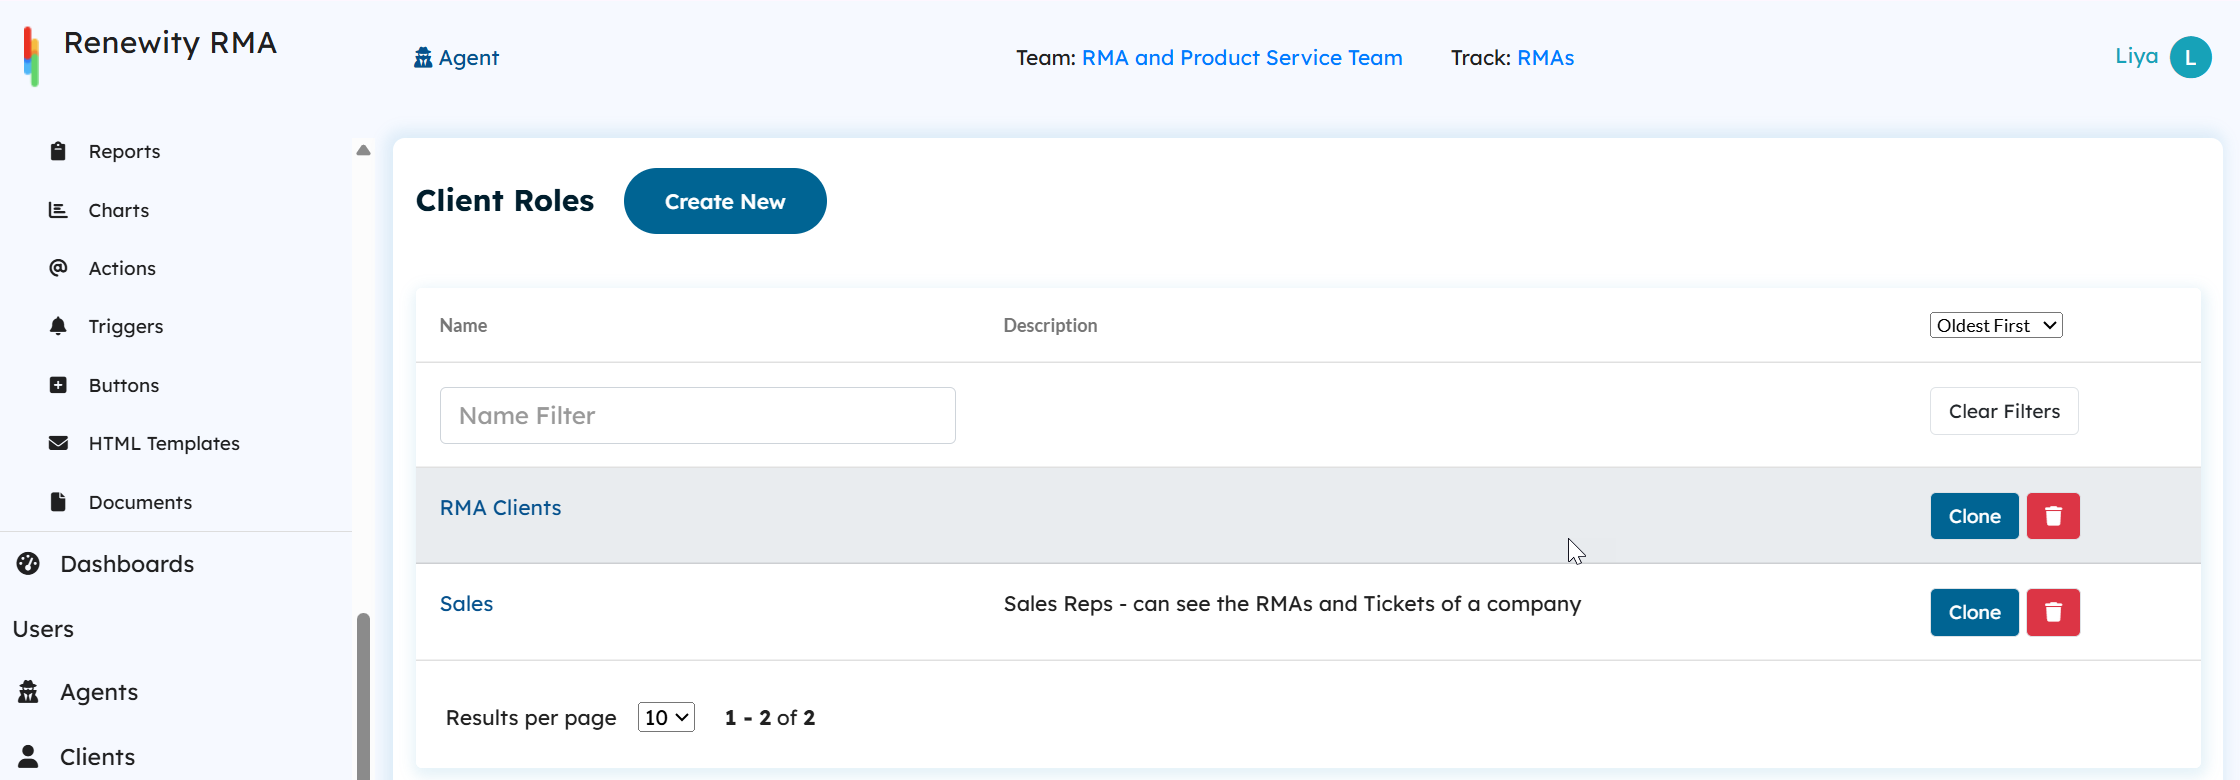
Client Roles
These roles are assigned to client users who access the client portal. Here, you will find RMA Clients and Sales roles. The Sales role is designed for internal users who need only limited access and do not require entry to the agent portal.
Track and Team Configuration
Once the roles are set up, the next step is configuring Teams and Tracks. You can think of a Track as a building block or framework. It defines the data fields, views, automations, and reports needed for a specific process.
A Team, on the other hand, works like a folder that groups related Tracks together, making them easier to organize and access.
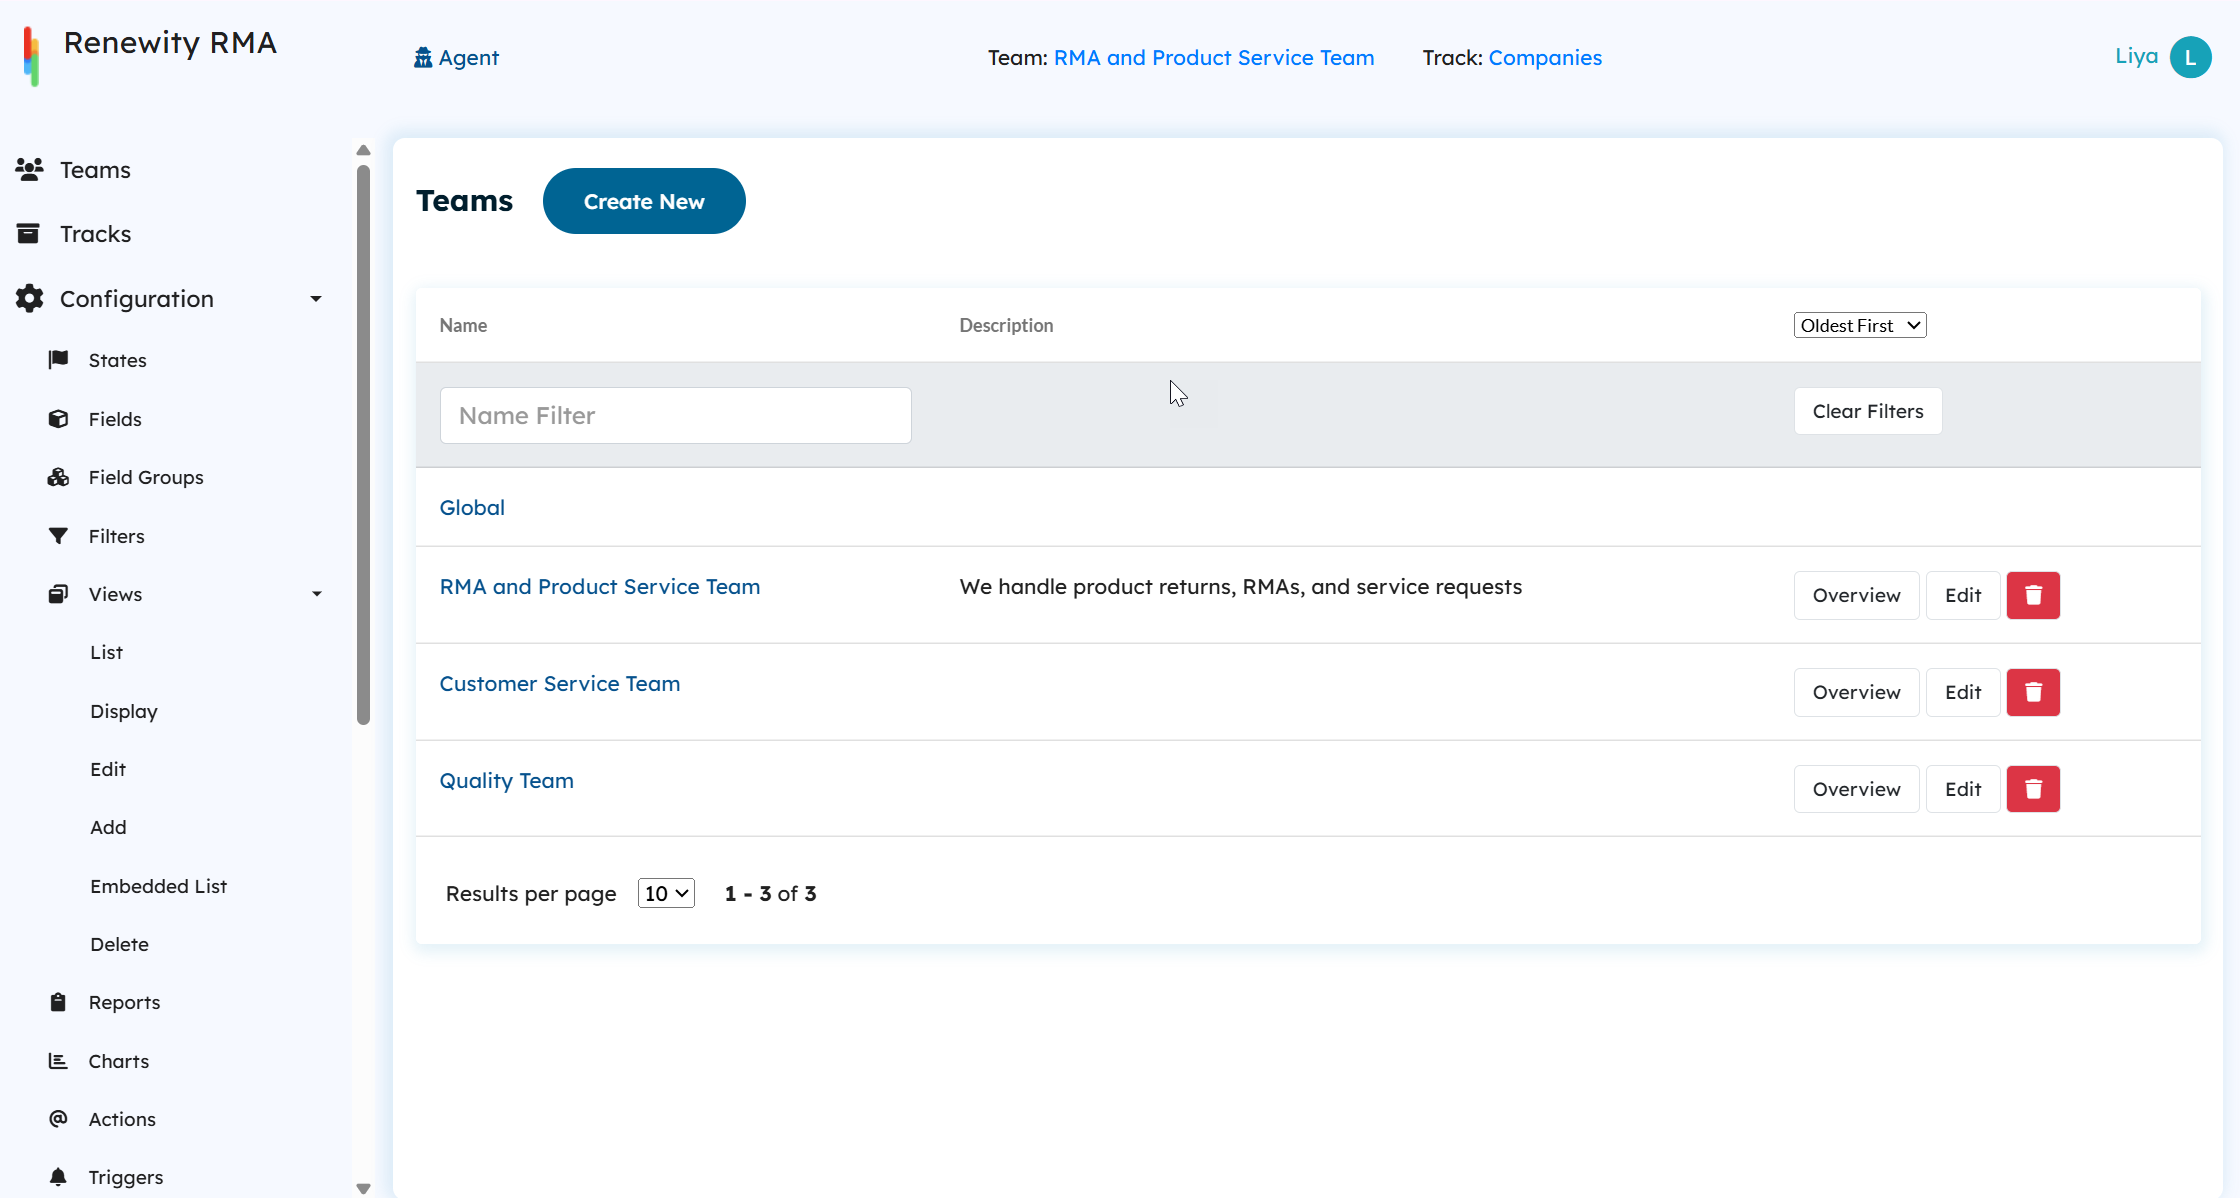
We will focus primarily on the RMA and Service Requests Team, as it contains all the tracks used in this template.
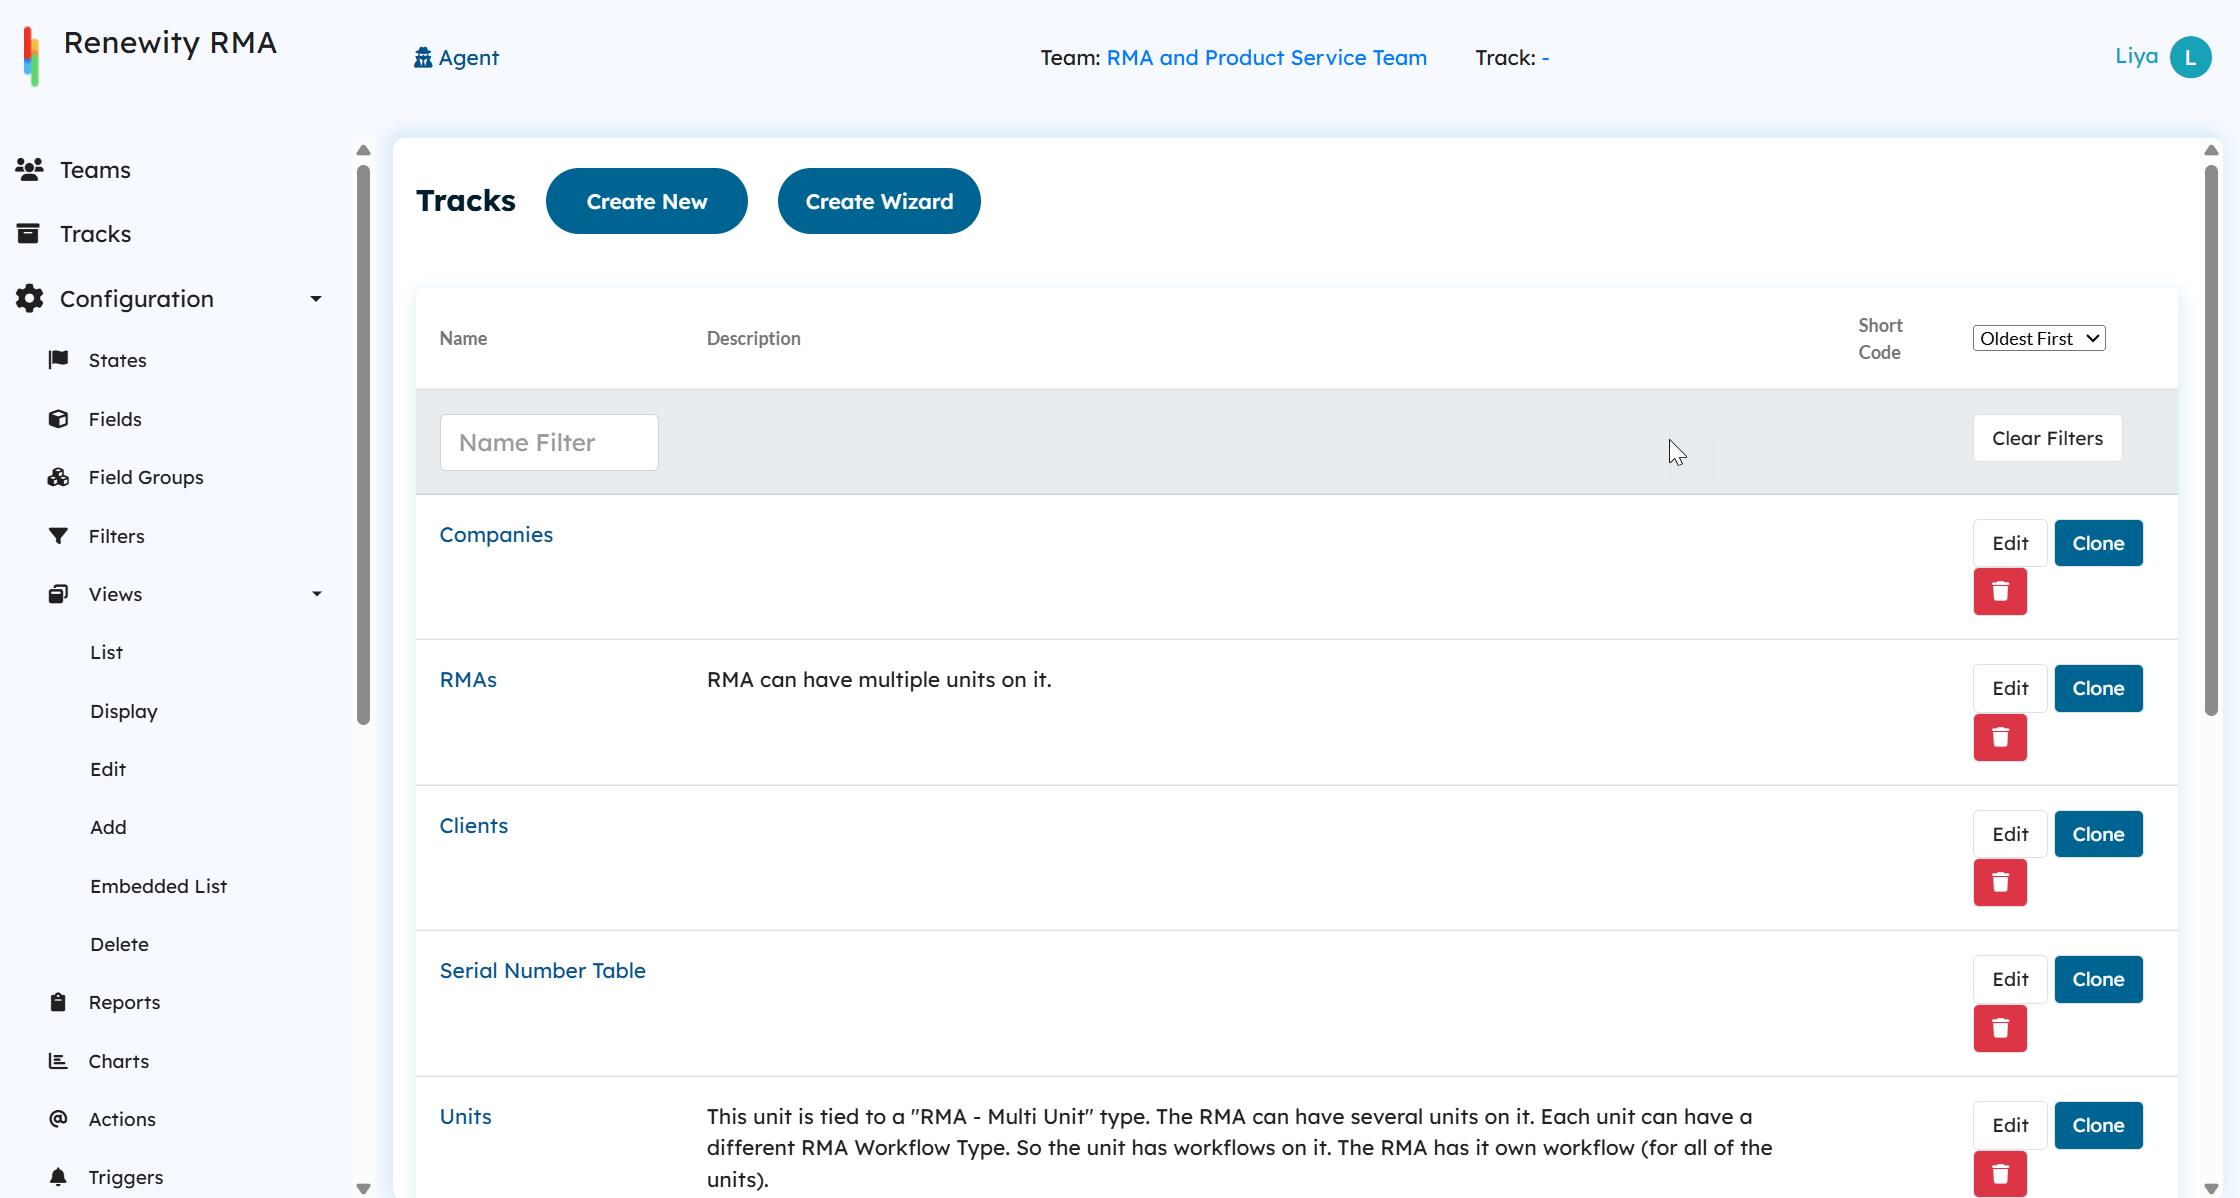
Tracks:
The RMA and Product Service Team includes the following tracks:
Tracks | |
|---|---|
RMAs | This track manages all multi-unit RMAs. Whenever you create an RMA, you are essentially creating an object of this track. Everything you see in an RMA, the workflow, the data fields, the automations are all defined here. |
Units | Think of this as a sub-track under RMAs. When you add units to an RMA, you are creating records here. It keeps unit-level information and workflows separate, but still linked to the main RMA track. |
RMAs-Single Unit | This track handles RMAs that involve only one unit. Unlike multi-unit RMAs, where the RMA and each unit can have separate states, single unit RMAs follow the same workflow for both. |
Unit-Single | This track is used to store and manage unit data tied to single unit RMAs. |
Companies | Works like a directory for company details. It captures company information, links their login accounts, and ties together their RMAs and tickets. |
Clients | Manages client user accounts, saves profile details, and connects users with their RMAs and tickets. |
Serial Number Table | This track helps us to manage a master list of unit serial numbers and warranty information. |
Tickets | Designed for client-created support tickets. |
Parts | Think of this as a master database of all parts in your inventory, along with their details. |
Parts Table | While the Parts Table lists everything available, this track records the actual parts used in an RMA lifecycle. Each time you use a part for a unit, you’re creating a record here making it easy to see which parts were used where, and to track them in one place. |
Labor | When labor is applied to an RMA, a record is created here. Over time, this builds a complete list of all labor used across RMAs separate from the reference table. |
Labor Table | This track is created to used a reference list of labor codes and their rate information. |
Spare Parts | Works like a stock monitor. It keeps track of part quantities and can be used to trigger low-stock alerts. |
Depot Locations | This track is configured to manage the depot locations and its address information. |
KB Articles | This track allows agents to create, edit, and manage knowledge base articles. |
Agents | Similar to the Clients track, this one manages agent profiles and account information. |
Each track is responsible for its own data fields, automations, views, and reporting, making it easier to manage and analyze information specific to that process.
In this section, we will focus on the main features of each track and briefly explain how they have been set up in this template.
RMA and Units Track
These two tracks work together to manage RMAs and their associated units.
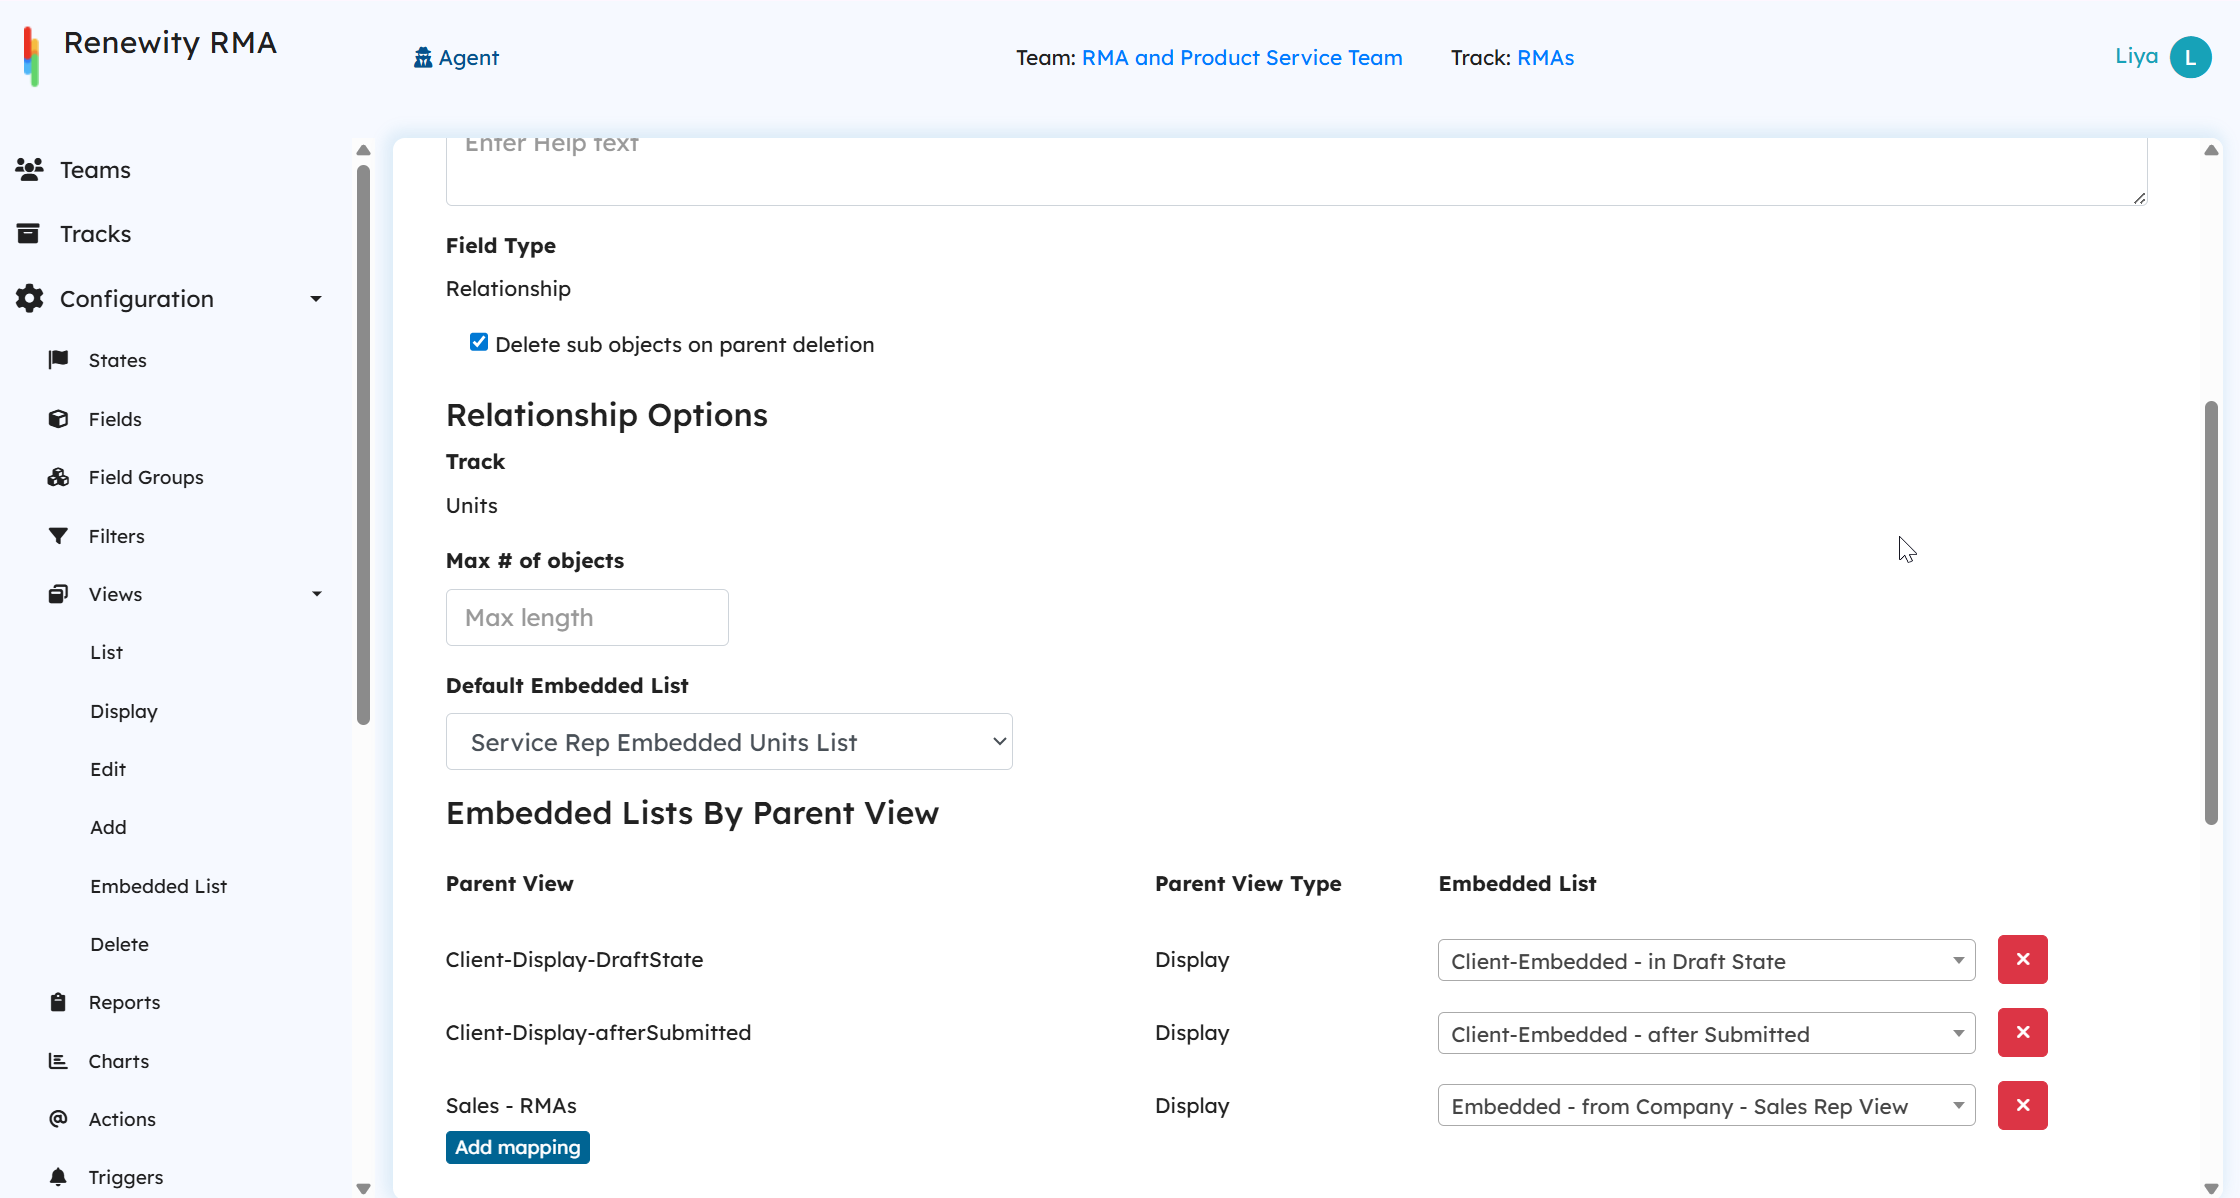
Units Relationship Field: A relationship is set up to link the RMA with its associated RMA Units. Since multiple units can be tied to a single RMA, a separate Unit Track is created to manage these units and link them back to the RMA.
Setting up an embedded list lets users see unit information directly within RMA views. This comes by default(Service Rep Embedded List, and you can also configure specific lists for certain parent views. Think of it as pinning the child records (units) right under the parent record (RMA) so you don’t have to jump back and forth.
Maintain separate workflows for RMAs and Units, since they are defined as two distinct tracks with their own states.
Automatically log any changes made to units in the RMA history, keeping everything linked and traceable.
Extraction Fields: These ensure the RMA automatically tracks the states of its associated units and uses that information in automations. Units are displayed under the RMA as embedded lists.
Views: Separate views are created for Agents and Client Users to control visibility of sensitive data. Additional views are also defined based on the RMA’s state and type.
Few major Automations:
OnCreate triggers: Link the RMA with the associated client and company, ensuring new RMAs are added to their respective lists.
OnEdit triggers: Triggered during unit extraction or RMA state transitions to send appropriate emails and update key fields (e.g., state labels, important dates).
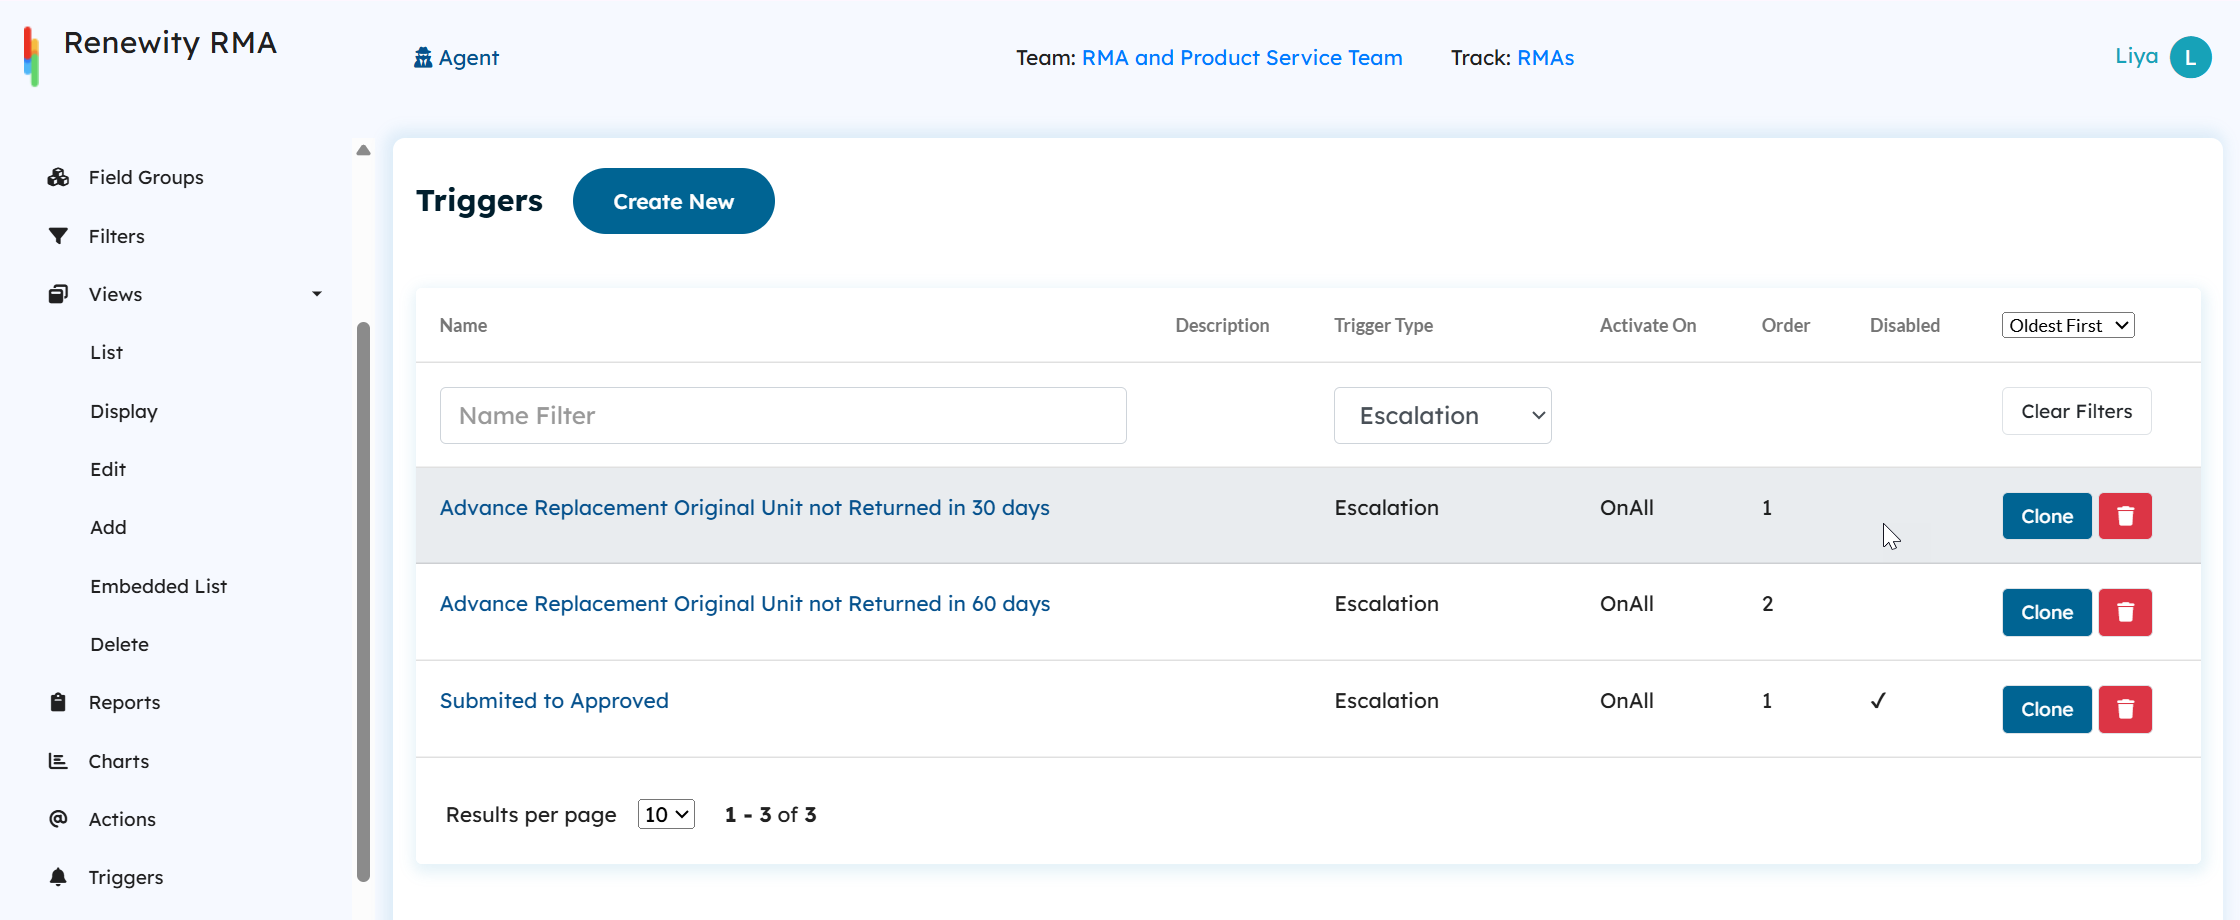
Escalation triggers: Send escalation emails to notify clients about pending actions such as shipping units.
Buttons: Buttons are primarily used for state transitions. They are tied to specific views where required, enabling users to move RMAs through their lifecycle with a single click.
Understanding Key Configuration Behaviors
How are the fields, buttons, and roles configured for each tab in a RMA?
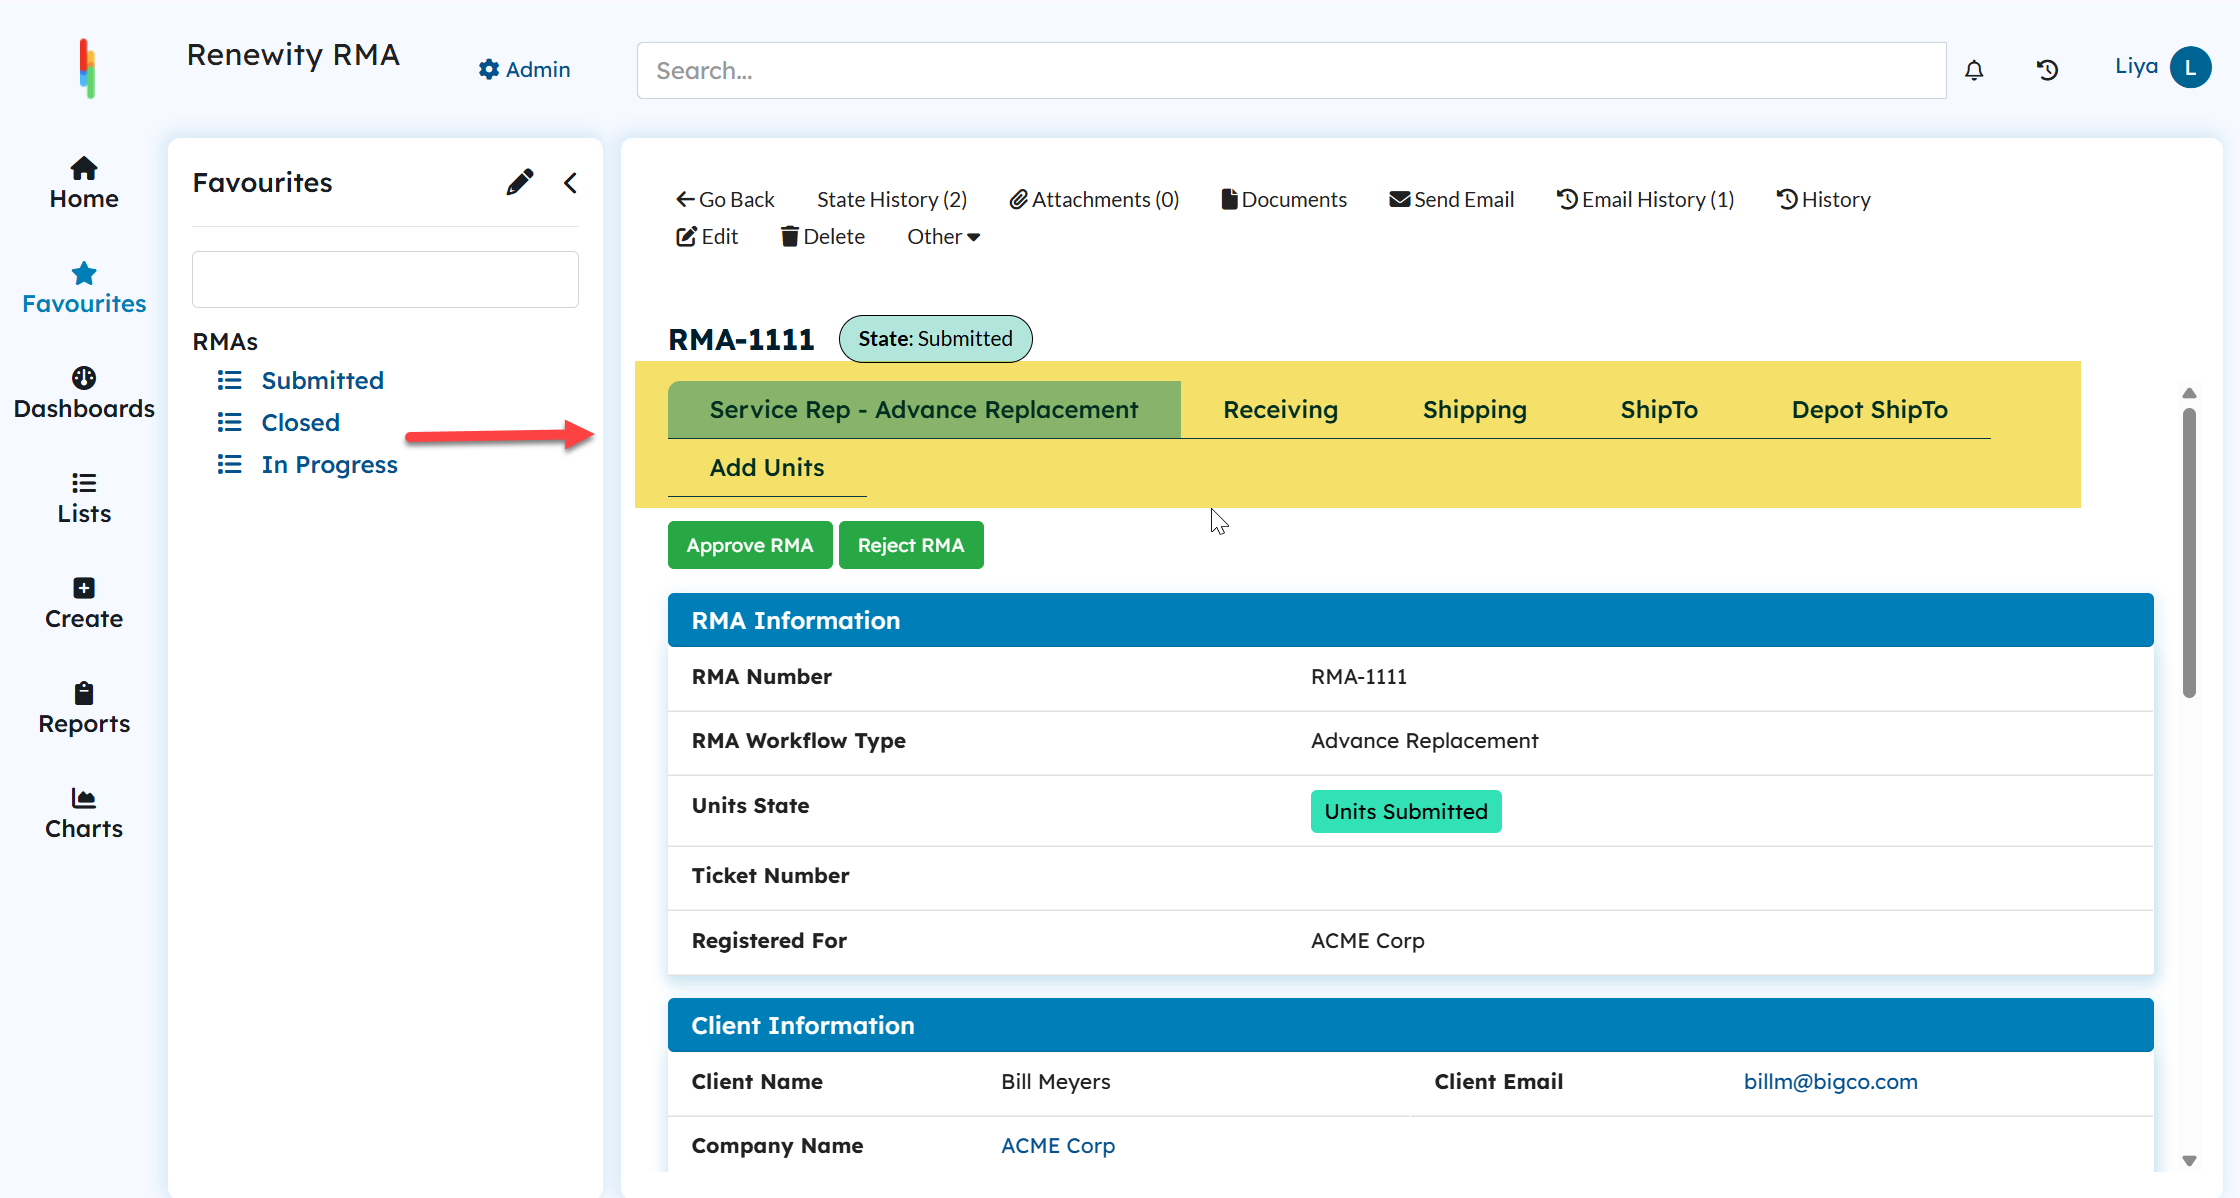
Each tab in an RMA is a Display View, which acts like a custom window into your data. When configuring a view, you mainly set:
Fields Groups: Which information should be visible in the tab (RMA Information and Client Information).
Buttons: Which actions users can perform directly from this tab (Approve RMA and Reject RMA).
Roles: Which users or roles have permission to see and interact with this view.
States: During which workflow states the view should be accessible.
This setup ensures that users only see the relevant information and actions based on their role and the RMA’s current state.
In the screenshot, there are six tabs. This means that for the Submitted state, this agent has access to six views, allowing them to see relevant information and perform the necessary actions.
Learn more about Display Views .
How does the Service Rep view change based on the RMA type?
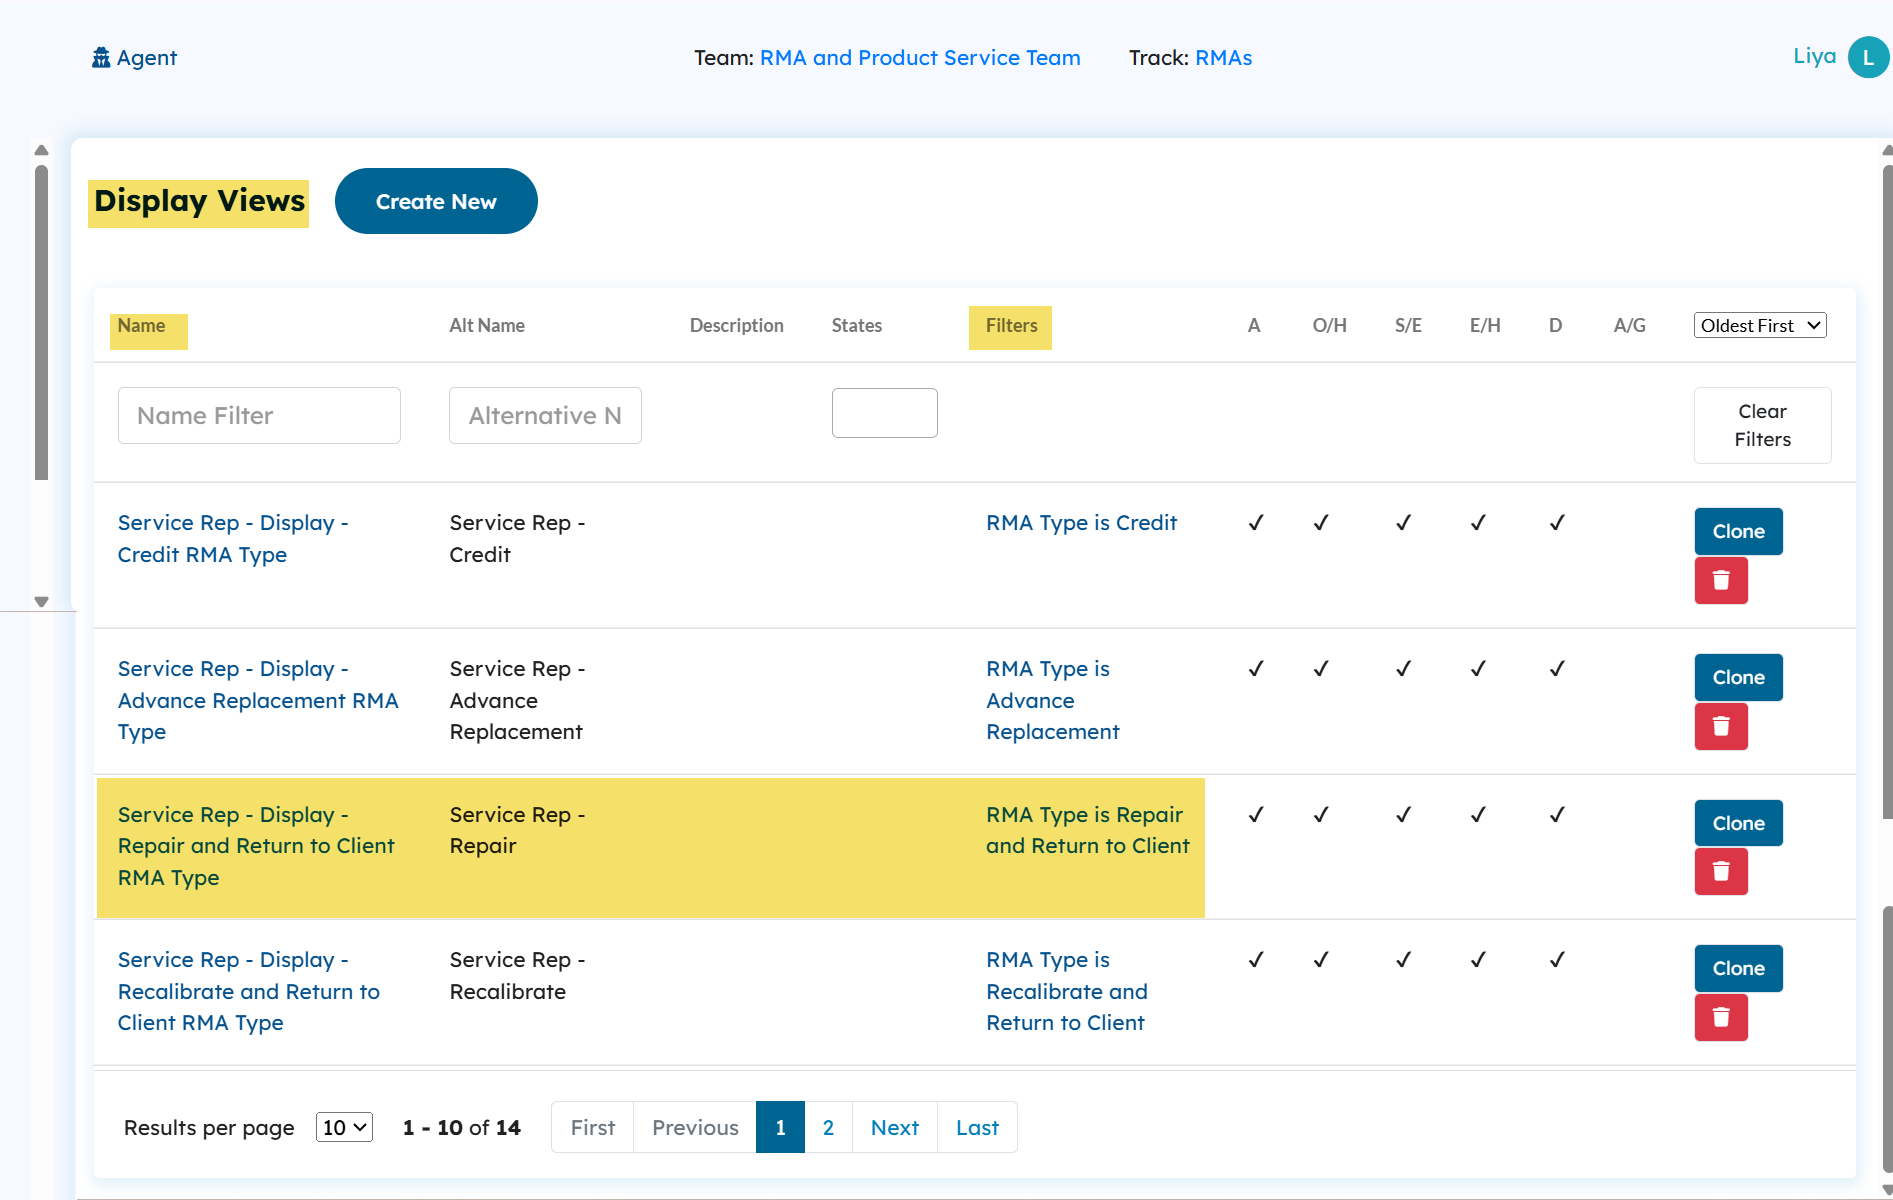
The Service Rep view tab of an RMA adapts to the RMA workflow type using filters on Display Views.
For example:
If the RMA type is Repair and Return to Client, the Service Rep – Repair tab will appear. This is because the view has a filter that shows it only when the RMA Workflow Type field is set to Repair and Return to Client.
In the same way, different RMA types will display different views, each with its own workflow process.
This ensures that agents only see the views and workflows that are relevant to the specific RMA type they are handling.
Learn more about Display Views and Filters.
How does the Units state label field get updated to reflect all the RMA’s unit states?
This is managed through extraction fields, edit triggers, and actions working together. Here’s how it happens step by step:
If all units in an RMA are repaired, an extraction field in the RMA track called “All Units Repaired” is set to Yes.
An edit trigger detects this change and runs a change field action that updates the Unit State Label field to show “All Units Repaired.”
Similarly, other extraction fields, triggers, and actions are used to reflect the current state of individual units back on the RMA.

Units Track
Each unit related to a multi-unit RMA is managed within this track.
States: Units follow their own state transitions, independent from the RMA, because the workflow depends on the unit type (Repair, Advance Replacement, Credit, etc.). These state details are captured in the RMA track through extraction fields.
Fields: Unit information includes problem descriptions, repair details, and troubleshooting info.
Lookup Fields: Warranty and product data are pulled directly from their respective tracks.
Relationship Fields: Relationship fields link the Parts and Labor tracks to the unit. This allows parts and labor used on a specific unit to be added and managed at the unit level, while still maintaining an system-wide record of parts and labor under their dedicated tracks.
Triggers:
OnCreate Triggers: Automatically determine the unit’s warranty status at creation, based on warranty dates pulled from the Serial Number table.
Buttons: Buttons are designed primarily for state transitions (and state reverts where necessary). They are tied to specific views, enabling users to progress a unit through its lifecycle with a single click.
Understanding Key Configuration Behaviors
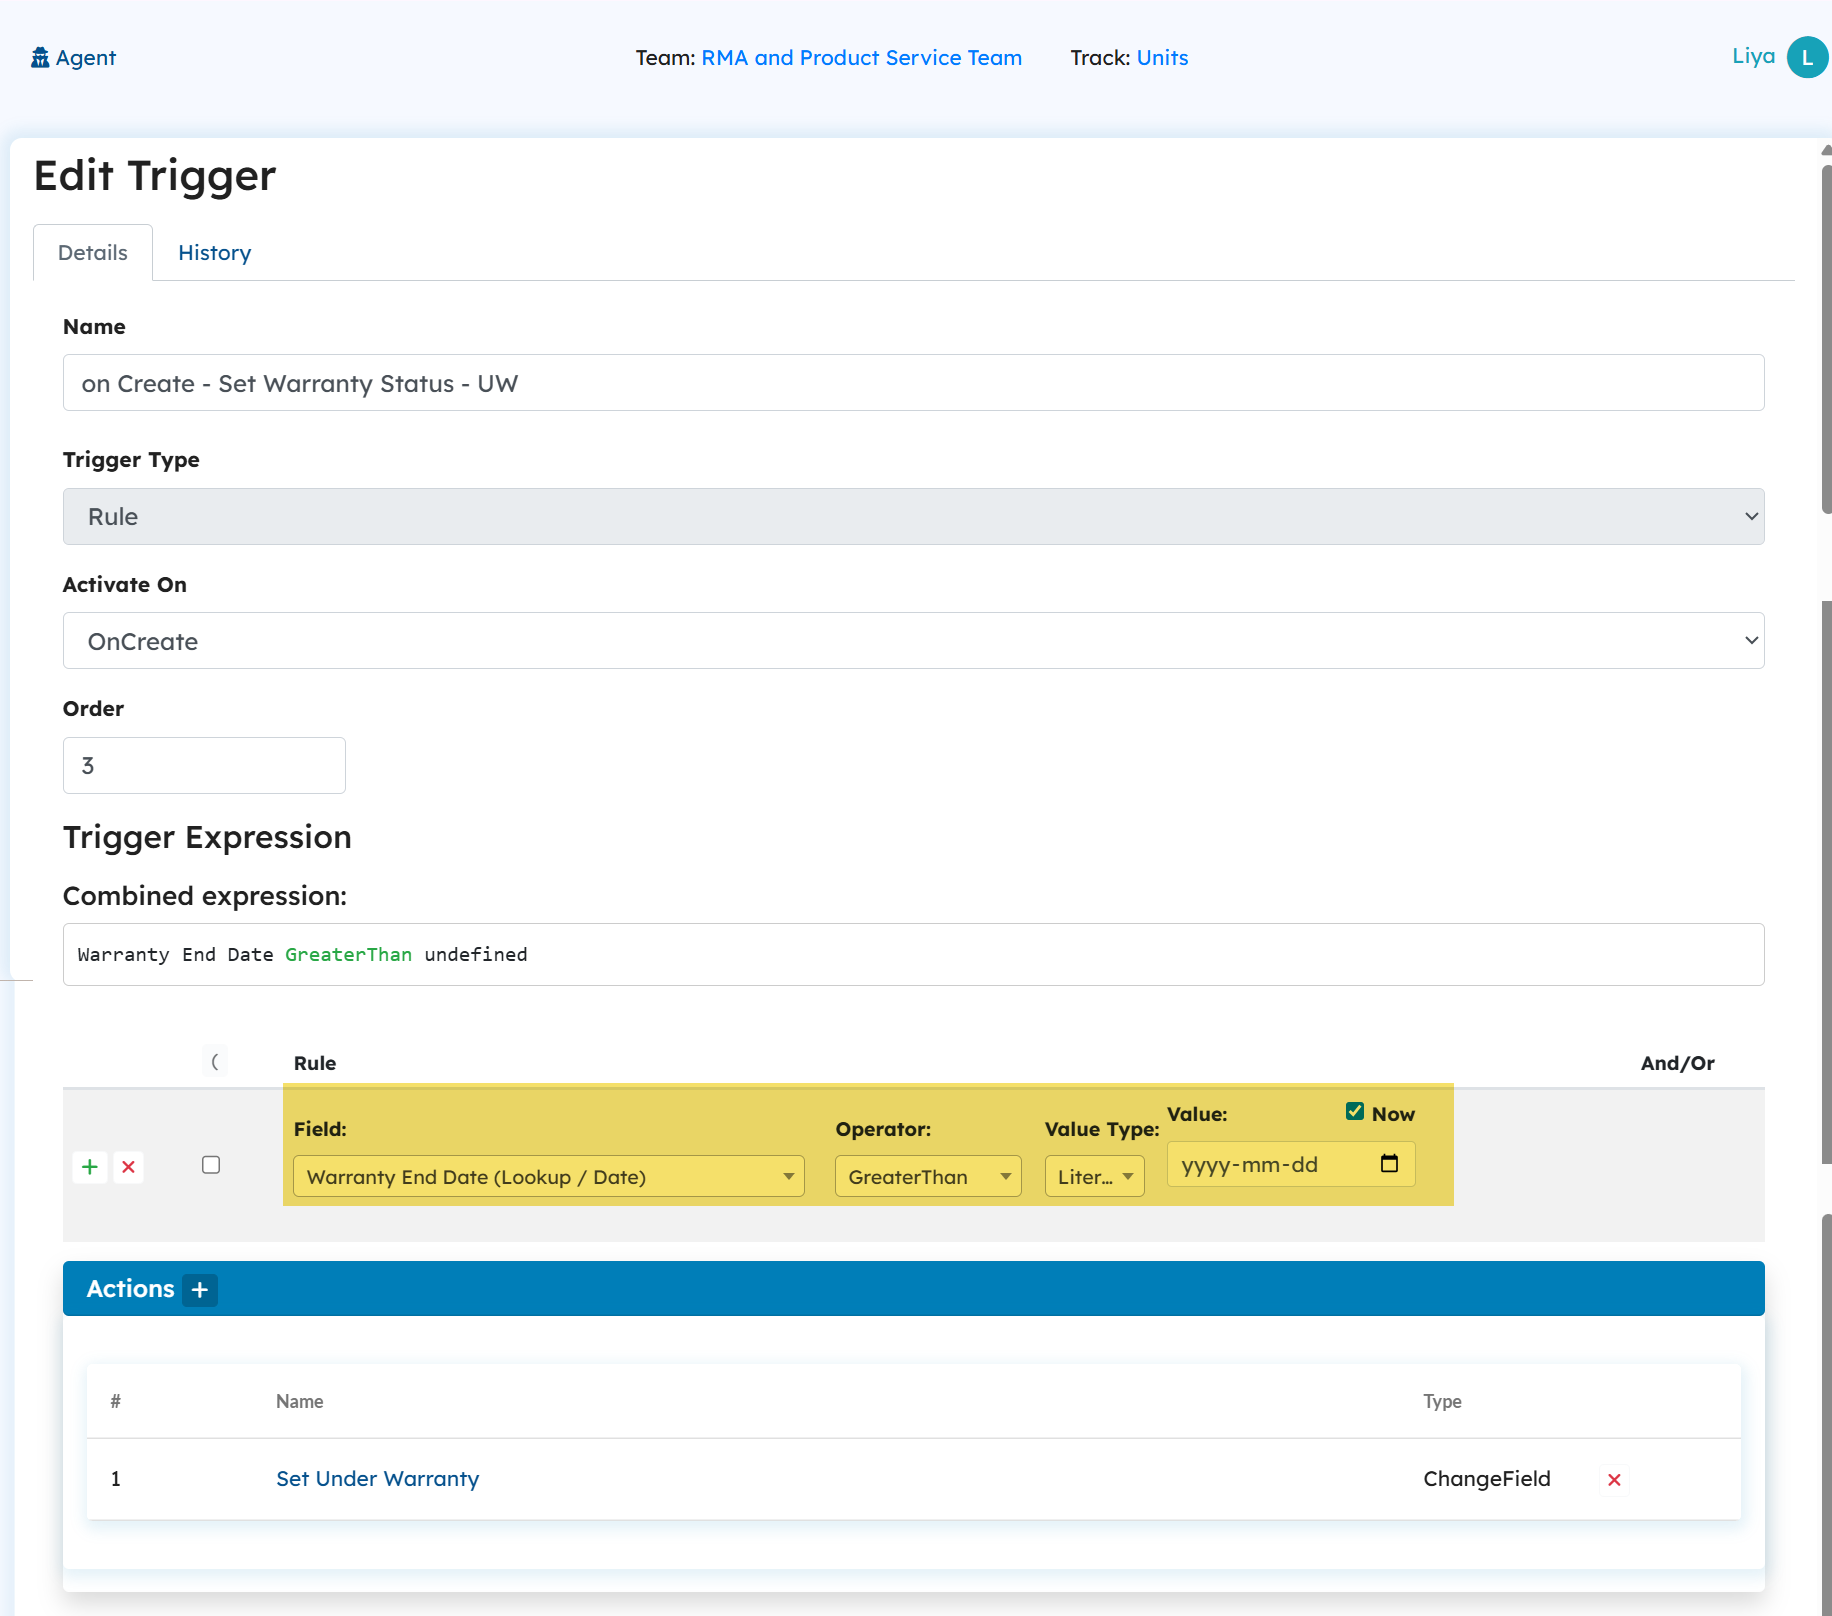
How is the Under Warranty label updated when a unit is added to an RMA?
This is handled automatically through a lookup field and triggers:
Warranty Lookup: When a unit is added, the system retrieves its Warranty End Date from the Serial Number track using a lookup field.
Trigger Check: Two On Create triggers are defined to check this date against the current system date.
Label Update:
If the Warranty End Date is later than today → the unit is marked Under Warranty.
If today’s date is later than the Warranty End Date → the unit is marked Out of Warranty.
Here is the screenshot of the configuration of the create trigger that sets Under warranty
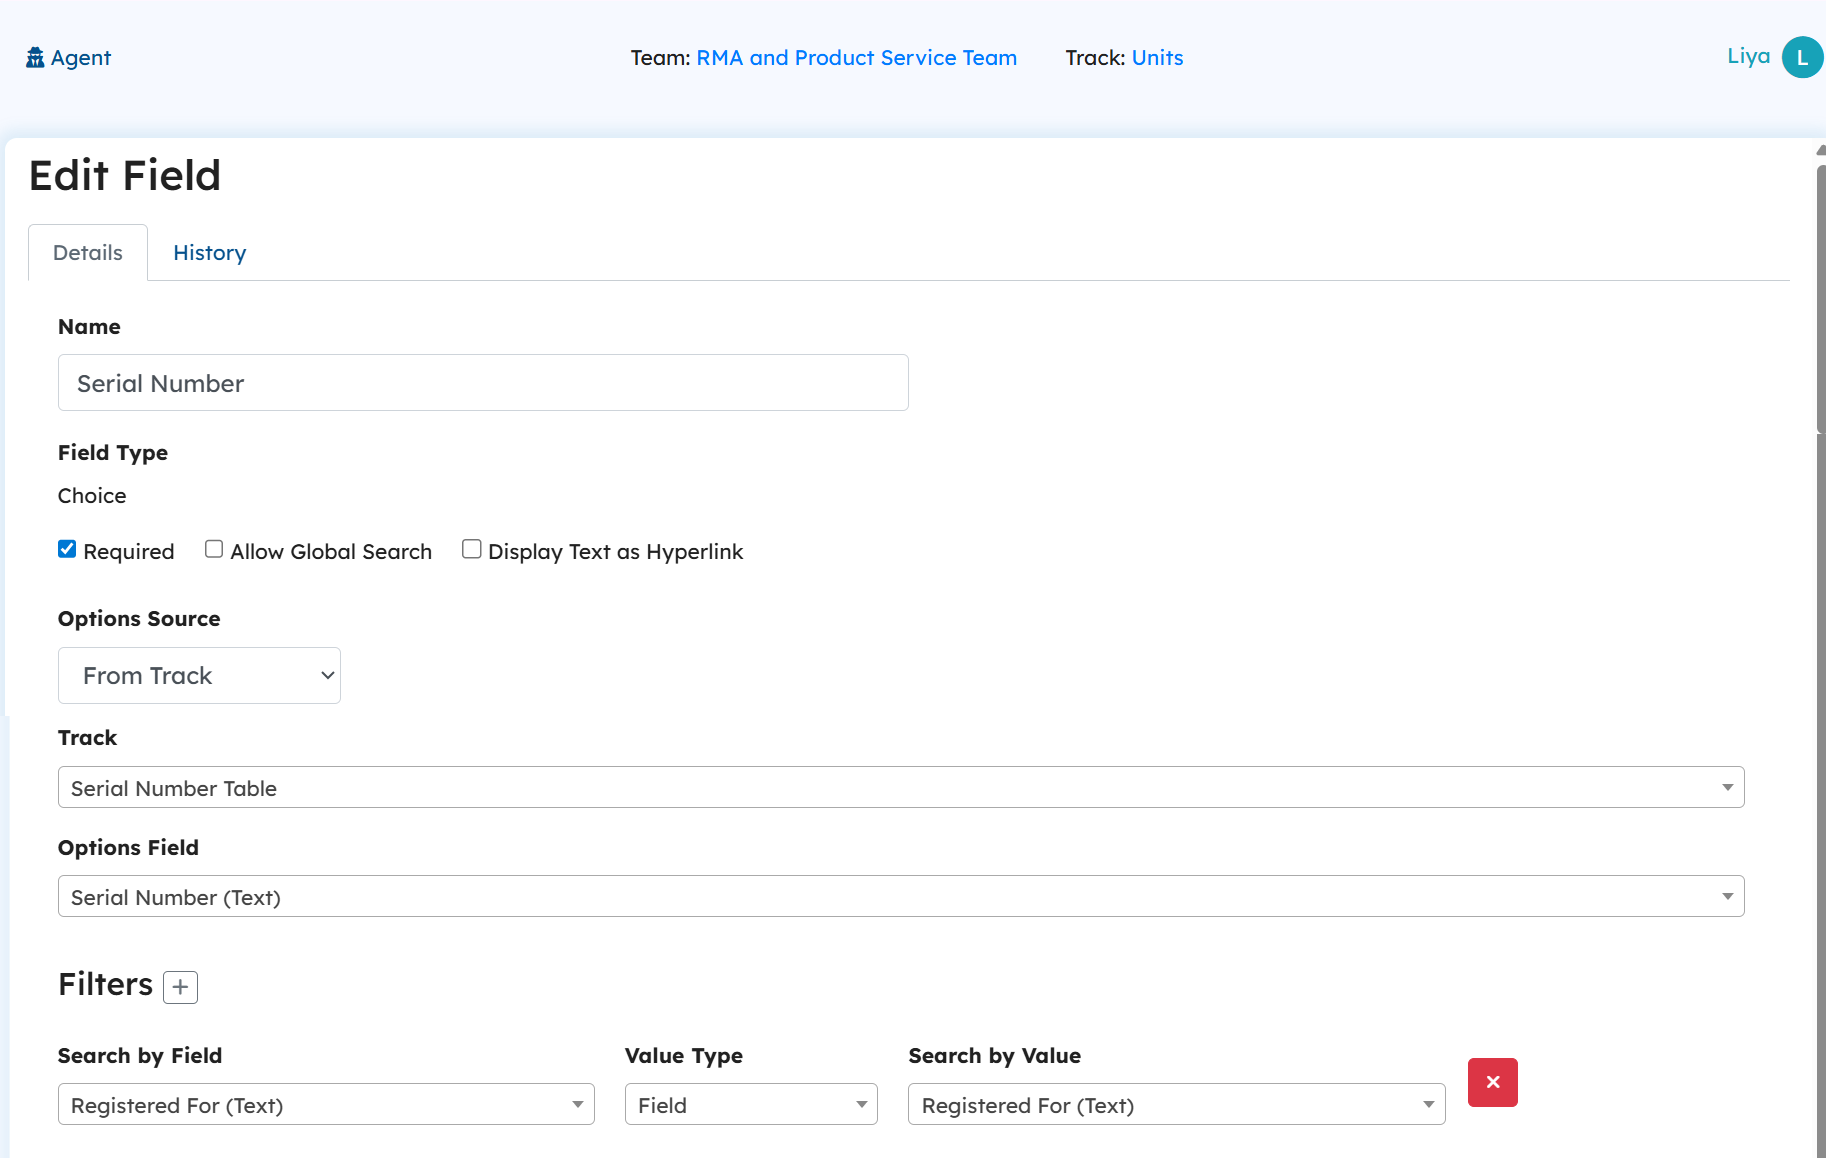
When adding a unit to an RMA from the client portal, how does the Serial Number dropdown display only relevant serial numbers?
The Serial Number field is a choice field that dynamically pulls its options from the Serial Number track.
Here’s how it works:
The dropdown options come directly from the Serial Number track.
When a client adds a unit, the field filters the list to show only the serial numbers that belong to that client’s company.
This ensures that clients don’t see serial numbers from other companies, keeping the process accurate and secure.
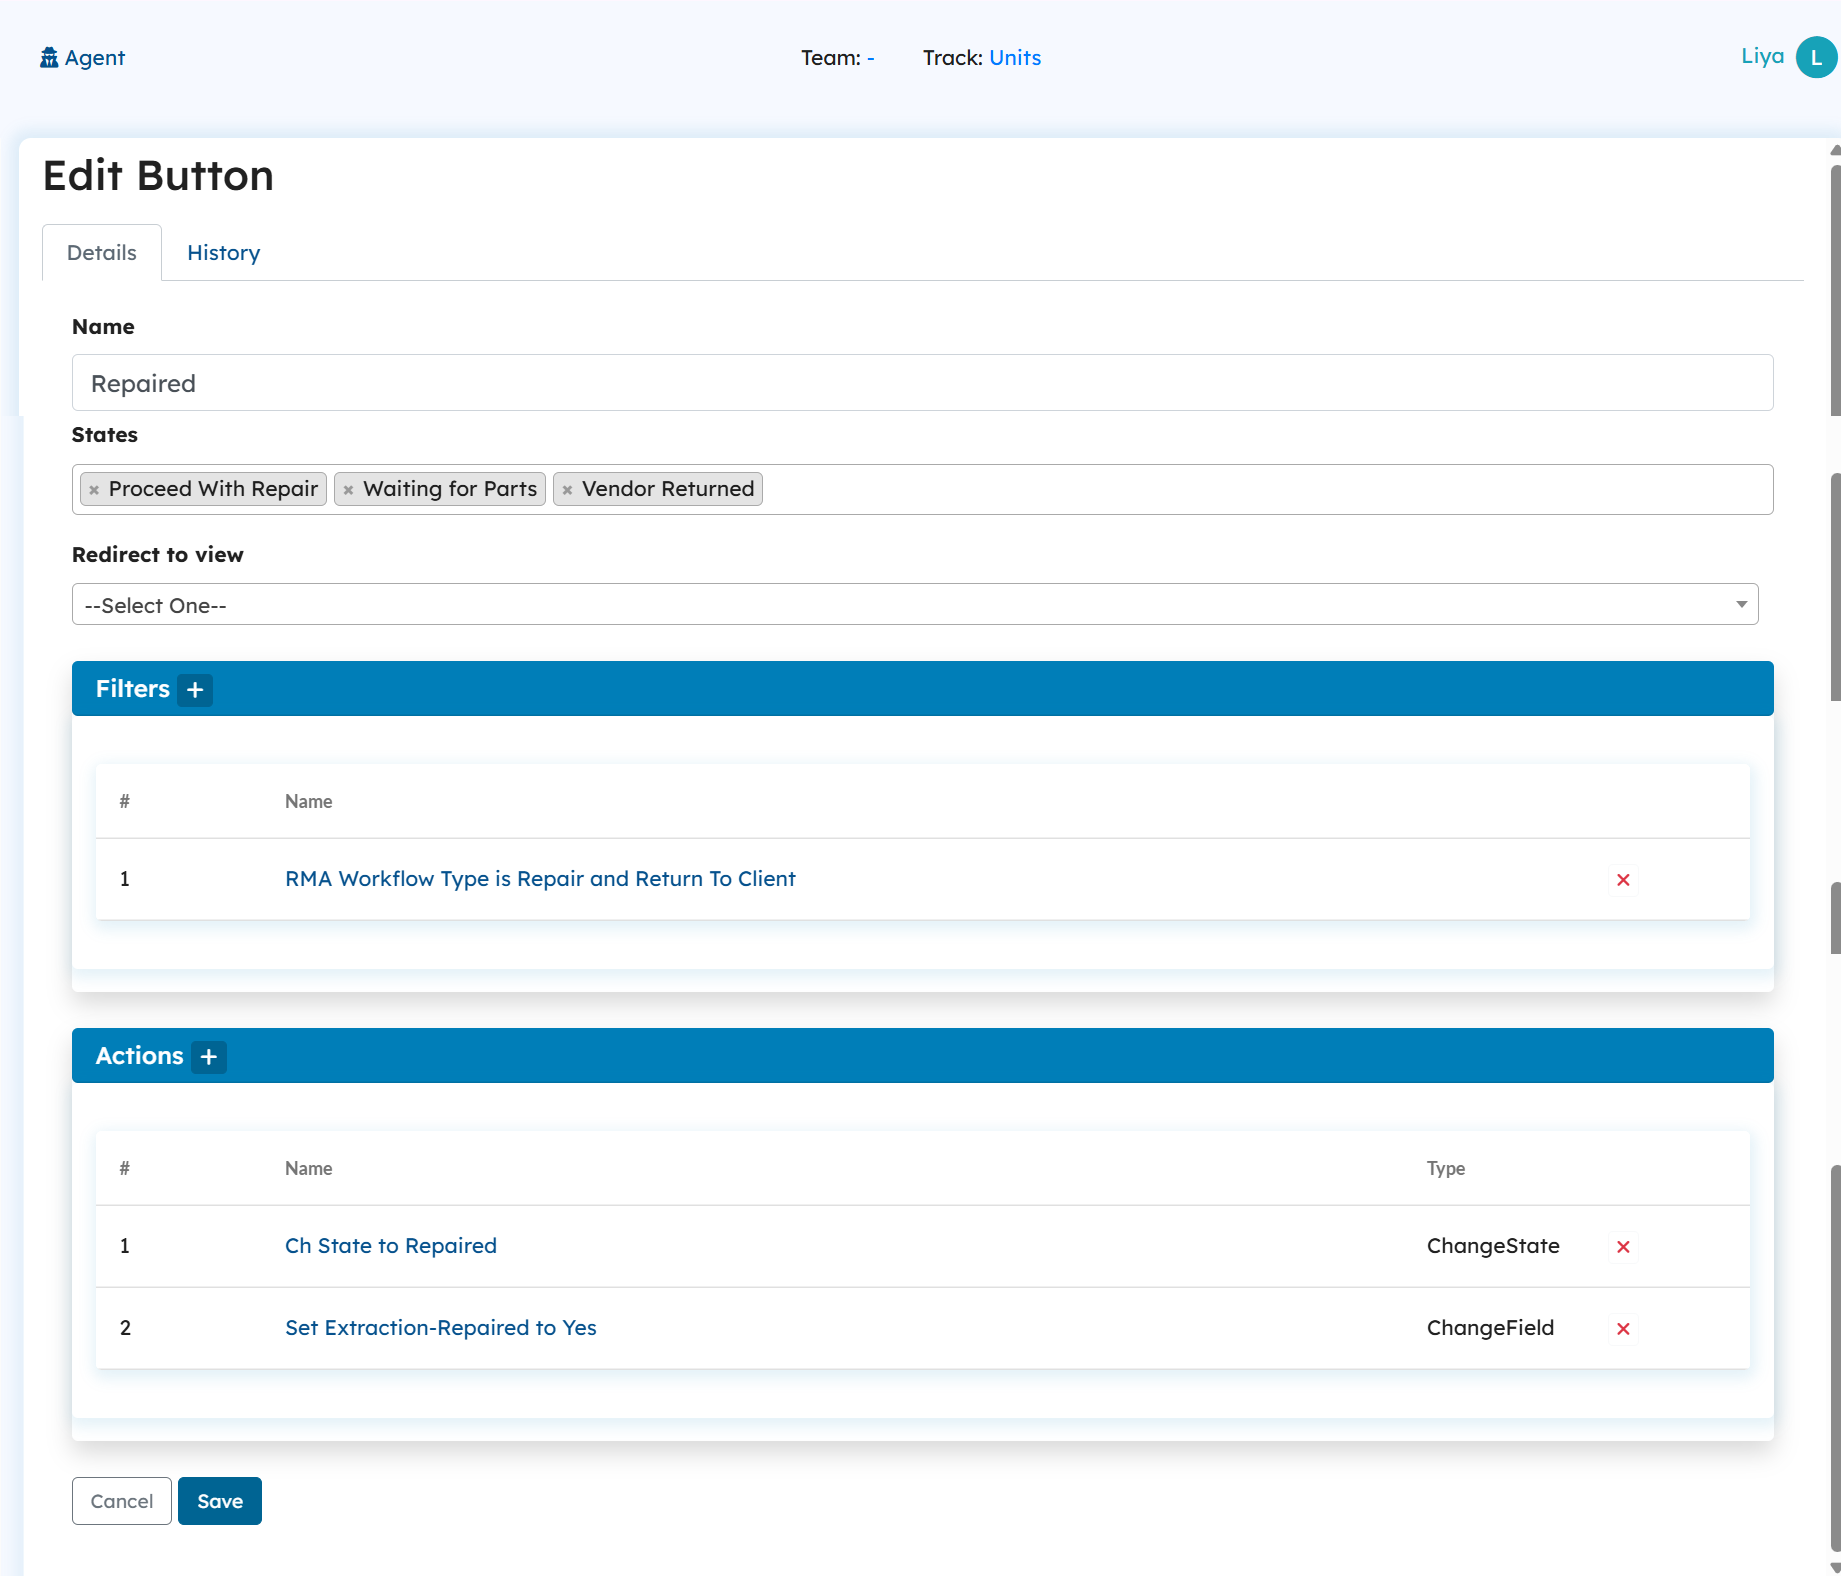
How do state transitions work using buttons?
In this template, state transitions are controlled through button configurations. Instead of allowing states to change freely, the system ties each Change State action to a specific button.
For example:
A button named “Repaired” is configured with a Change State action that moves the object’s state to Repaired.
This button is then attached to the relevant display view.
When an RMA service representative completes a repair, they navigate to the display view, click the Repaired button, and the unit’s state automatically updates to Repaired.
Here is the screenshot of the Repaired Button configuration.
Why it’s useful:
This approach prevents accidental or unauthorized state changes, keeps workflows consistent, and makes it clear which actions are available at each stage.
Companies Track
The Companies Track manages all company information engaged in RMAs and services.
Fields: Captures company details such as contact info and addresses.
Relationship Fields: Links companies to their associated clients, RMAs, and units, ensuring all activities are linked correctly.
Understanding Key Configuration Behaviors
How are new RMAs or tickets automatically linked to a company’s display view when they are created?
When a new ticket is created under a company, a create trigger is configured to fire immediately. This trigger has an “Add to Relationship” action that links the newly created ticket to its company, ensuring the ticket appears in the company’s display view on creation.
Here is a screenshot of an add to relationship action that links the ticket to its company.
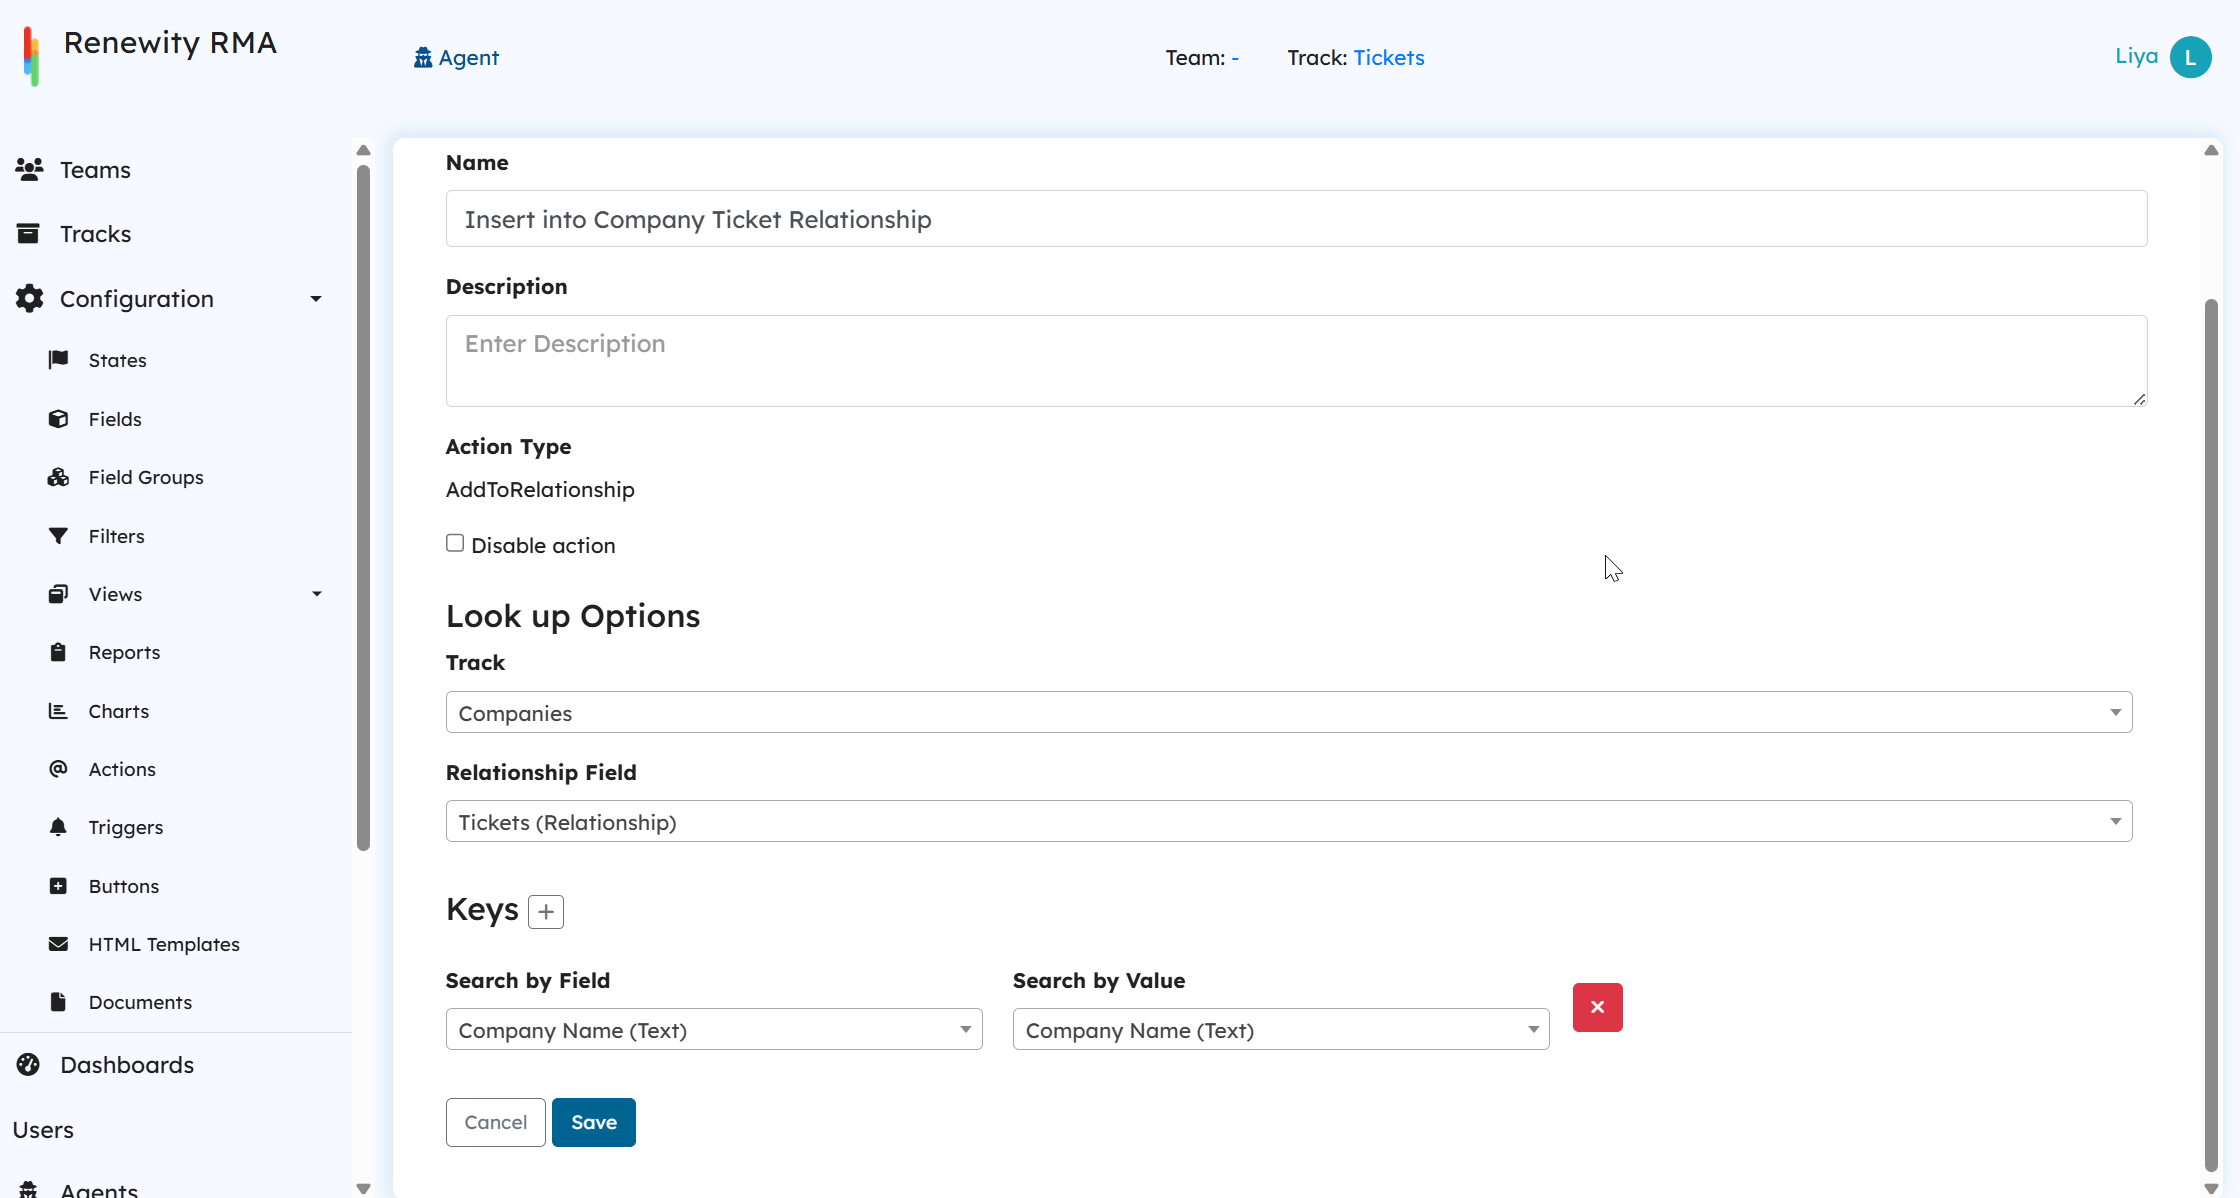
Similarly, for RMAs, a dedicated create trigger automatically adds the new RMA to its company. In addition, during both ticket and RMA creation, these create triggers are also set up to link the new records to their corresponding client accounts.
Clients Track
The Clients Track stores details of individual contacts under a company.
Fields: Includes contact information, roles, and service preferences.
Relationship Fields: Links clients to their company records and related RMAs or tickets.
Triggers: Can notify clients on RMA creation or status changes.
Buttons: Provide shortcuts for creating new RMAs or tickets directly from a client record.
Serial Number Table
The Serial Number Table is the foundation for product identification.
Fields: Includes serial number, product type, warranty dates, and configuration details.
Relationship Fields: Connects each serial number to its unit, product, or RMA.
Triggers: OnCreate triggers calculate warranty status or flag expired warranties.
Buttons: Enable lookup of all RMAs or units associated with the serial number.
Parts Track
The Parts Track manages spare and replacement parts used in services.
Fields: Captures part number, description, stock levels, and pricing.
Relationship Fields: Links parts to units and labor used in an RMA.
Triggers: Automations can reduce inventory when parts are consumed.
Labor Track
The Labor Track records technician time and work performed on units.
Fields: Includes labor codes, task descriptions, hours worked, and cost.
Relationship Fields: Connects labor to units and RMAs for cost tracking.
Triggers: Automates calculation of total repair cost when labor entries are added.
Buttons: Actions like "Add Labor to Unit" or "Generate Work Order."
Tickets Track
The Tickets Track manages customer issues and support cases.
Fields: Contains ticket subject, description, priority, and resolution notes.
Relationship Fields: Links tickets to clients, companies, and RMAs.
Triggers: Tickets can automatically convert to RMAs based on resolution.
Buttons: "Escalate to RMA" or "Reassign Agent."
Understanding Key Configuration Behaviors
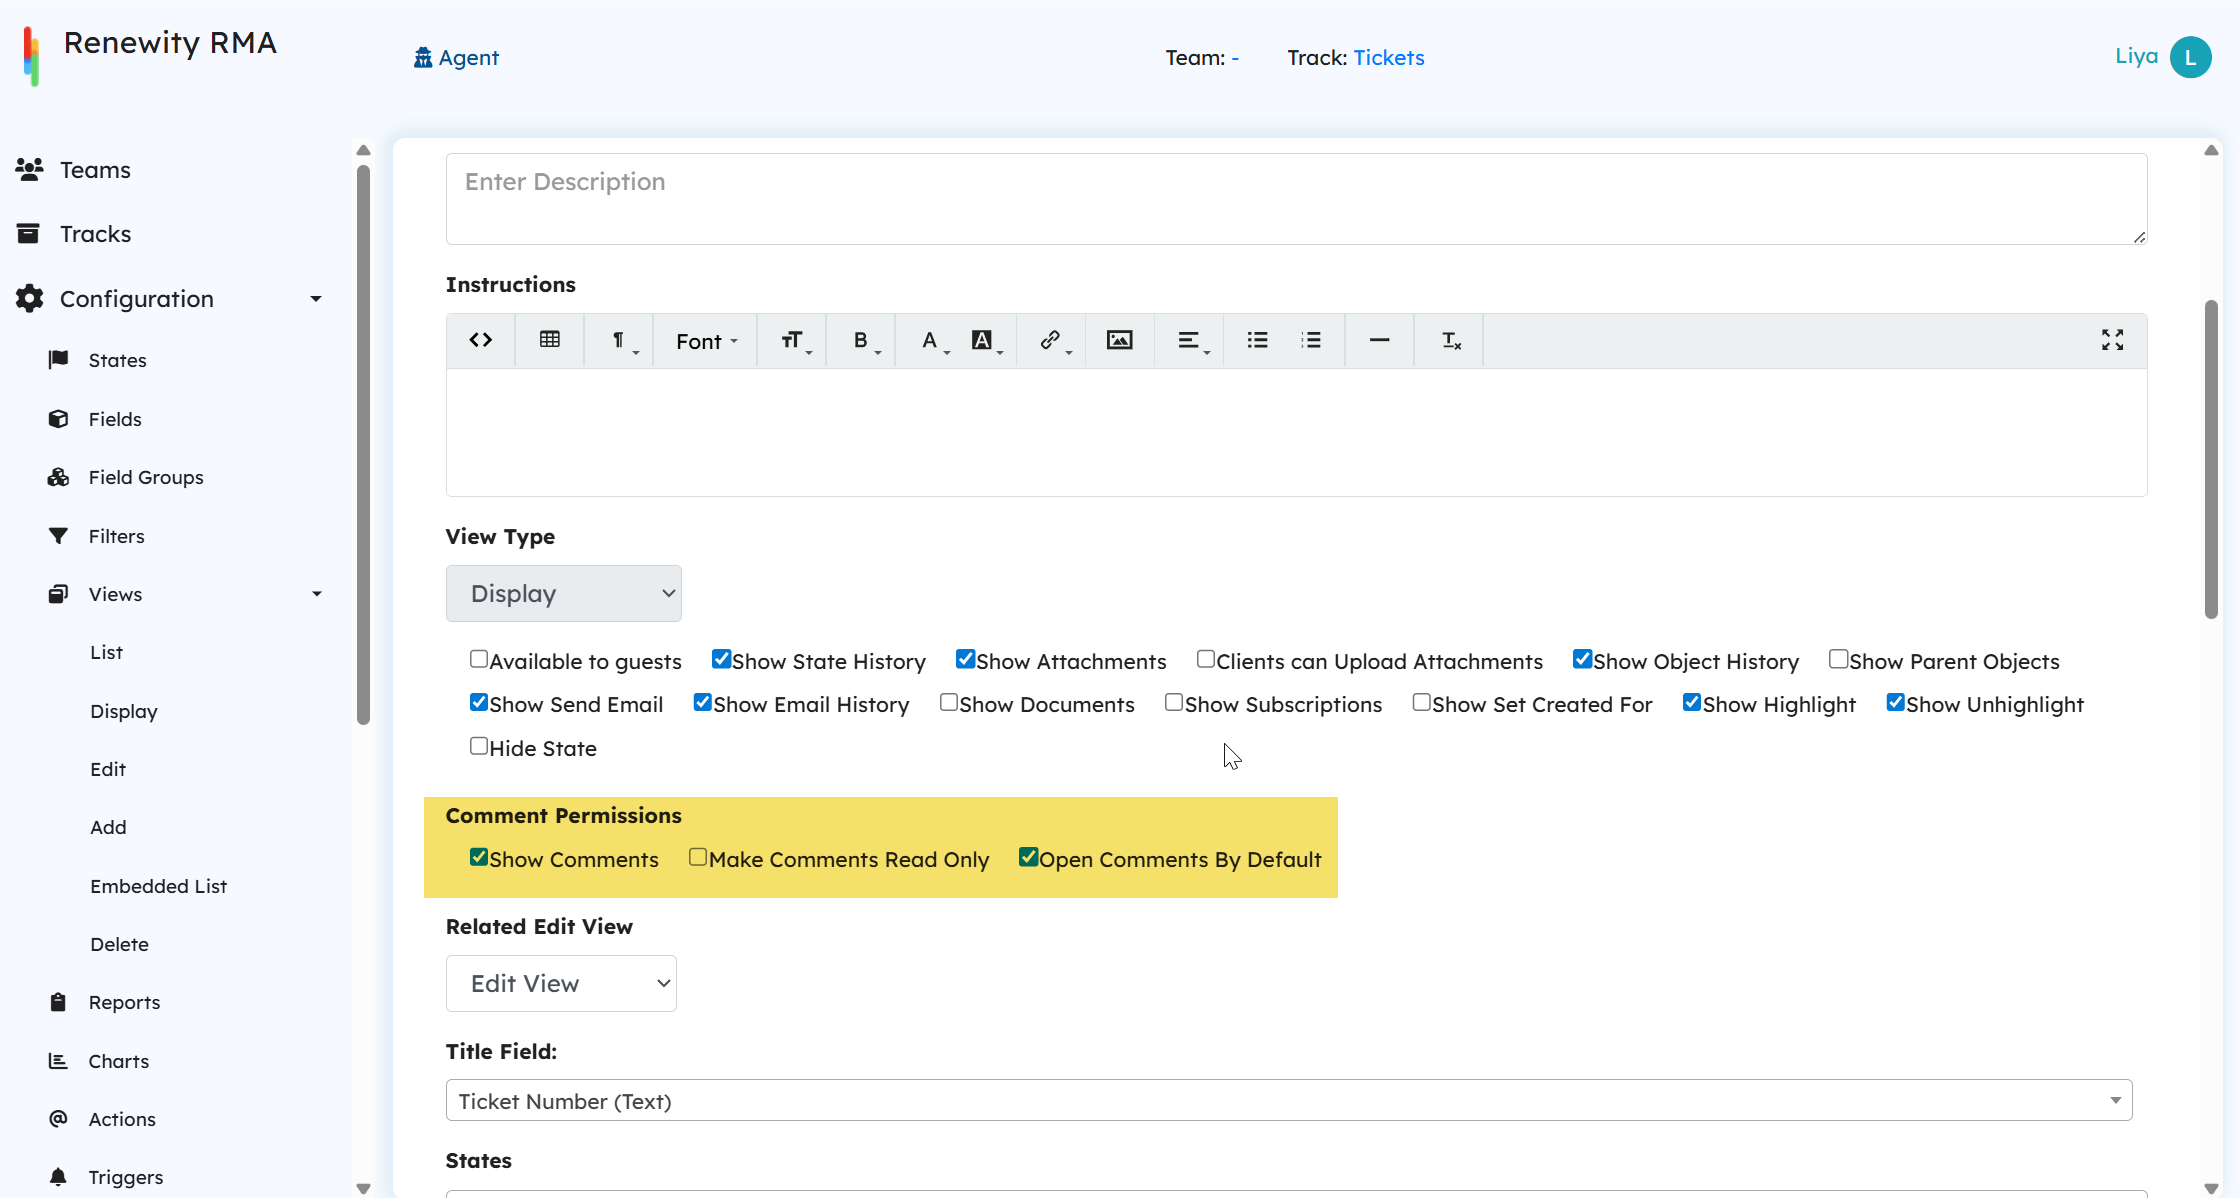
How is the comments section always kept open for tickets?
This behavior is controlled by a view setting. If the “Open comments by default” checkbox is enabled in the view configuration, the comments section will always remain open whenever the ticket is displayed.
Here’s an example screenshot of the ticket display view settings with the “Open comments by default” option enabled.
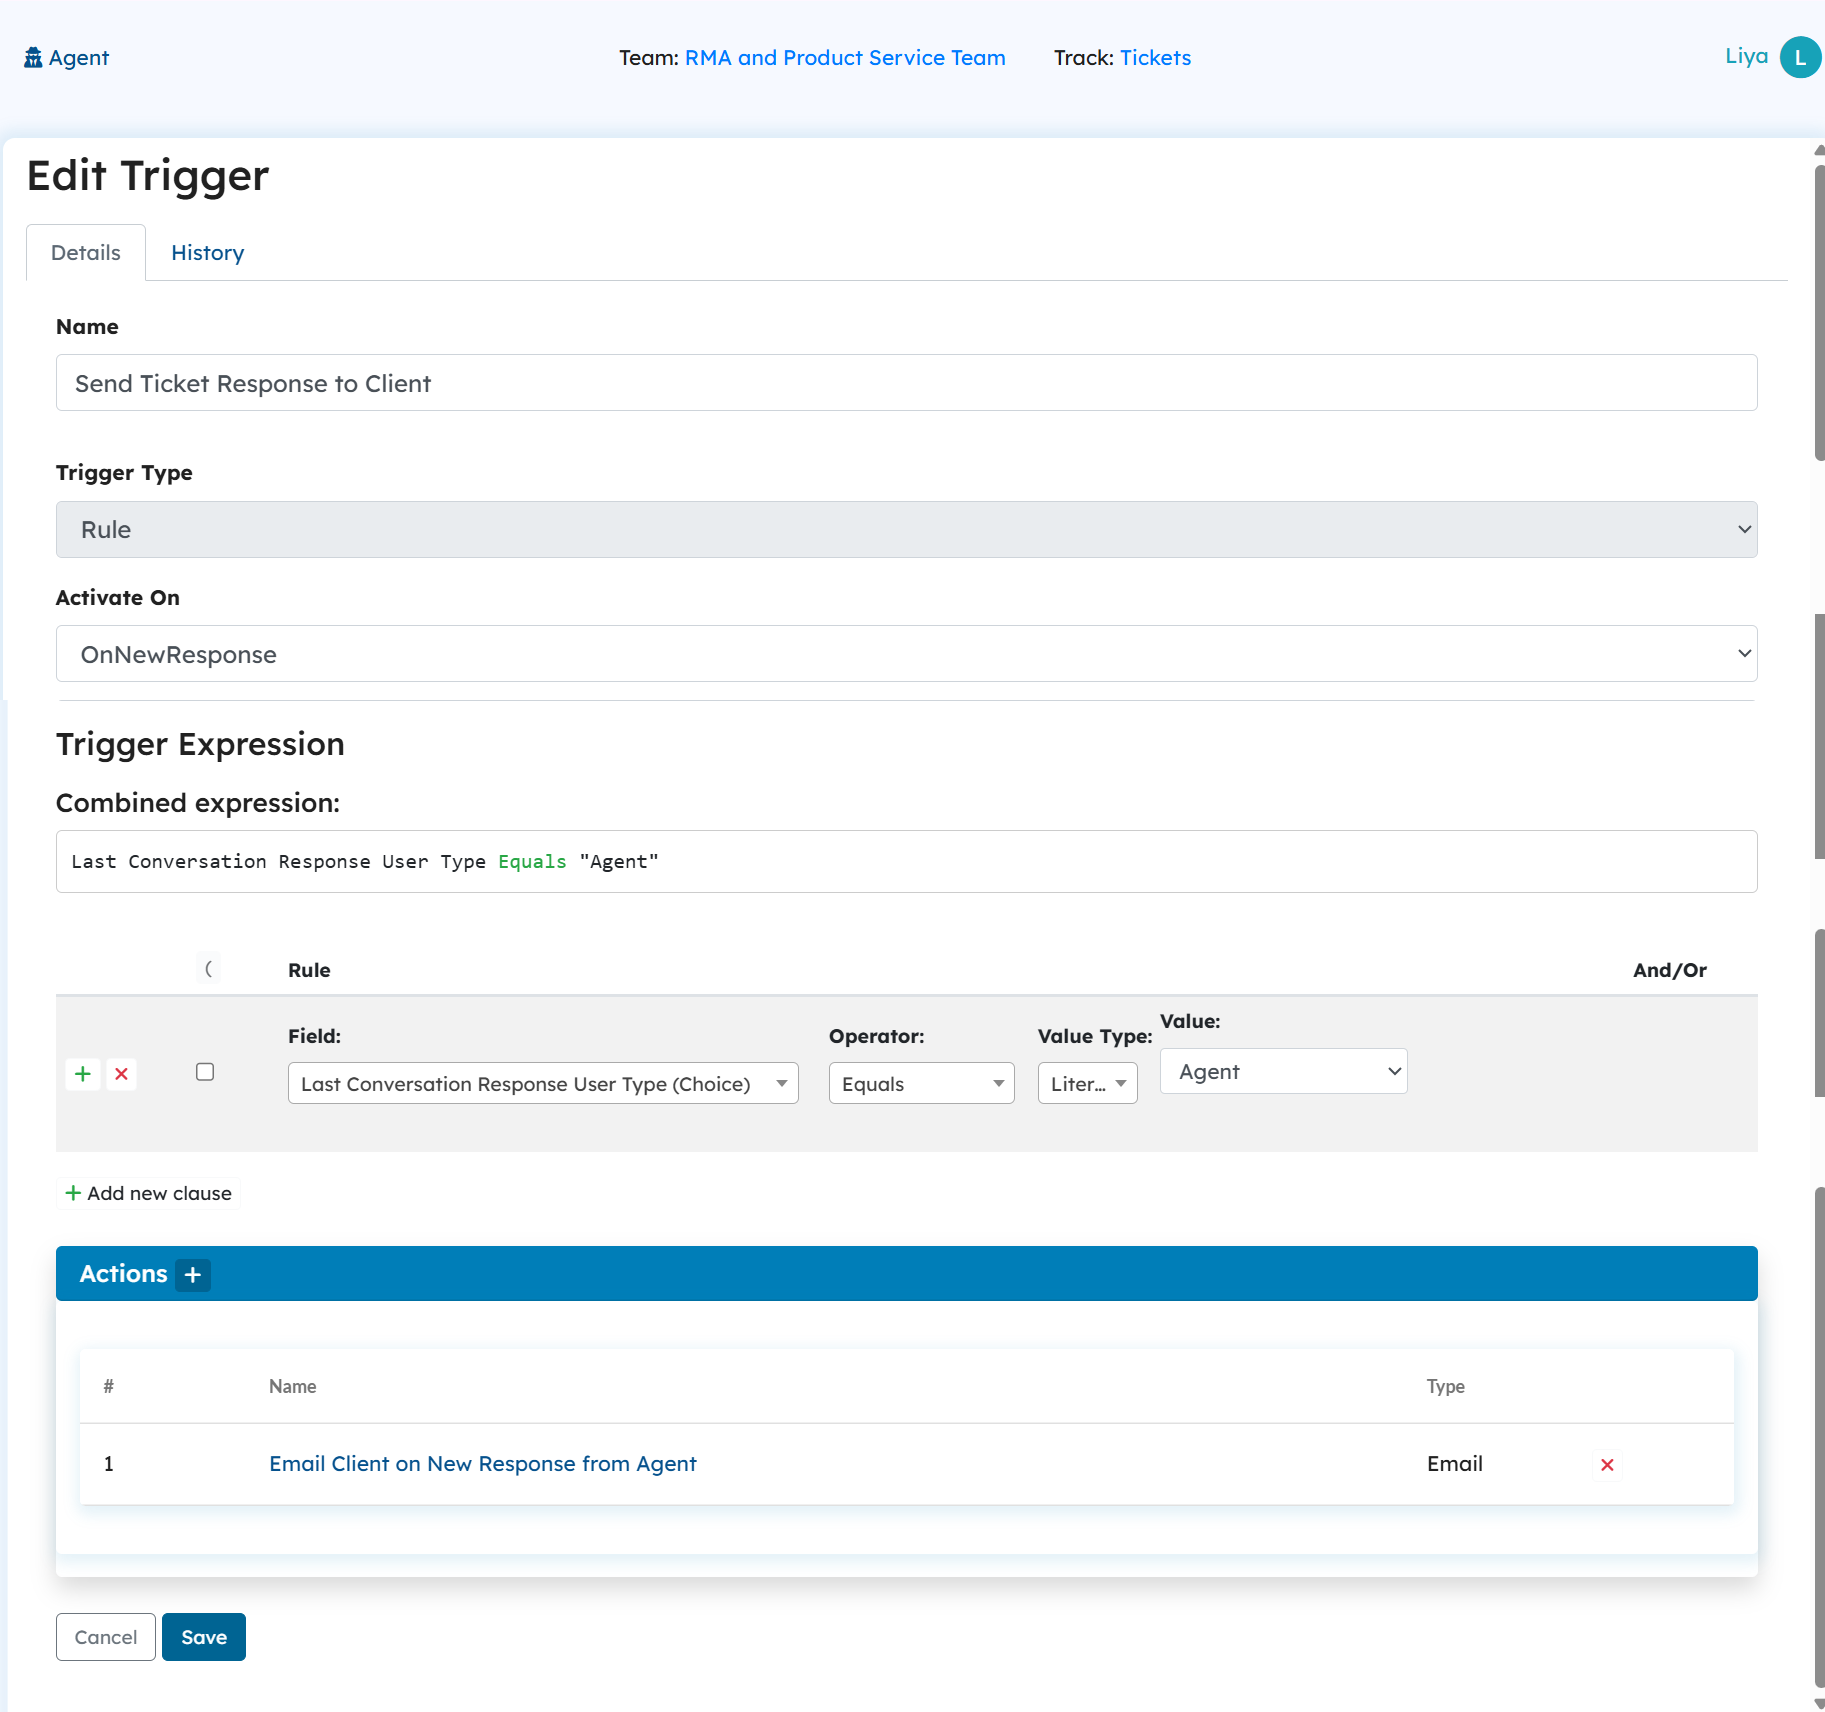
How do users receive email notifications when a comment is updated on tickets?
Email notifications for comment updates are managed through OnNewResponse triggers. These triggers are configured to send email actions to users involved in the ticket whenever a new comment is added.
In the configuration, there are typically two OnNewResponse triggers:
Agent → Client Notification: When a new comment is added by an agent, the trigger fires and sends an email notification to the client user.
Client → Agent Notification: When a comment is added by a client, the trigger fires and sends an email notification to the assigned agent.
To determine who posted the latest comment and to pull the correct text into the email, the system uses special fields like:
Last Conversation Response User Type (to identify if it was an agent or client)
Last Conversation Response Text (to include the most recent comment).
Here is a screenshot of the OnNewResponse trigger that validates whether the comment came from the agent and then sends the corresponding email notification to the client.
Knowledge Base (KB) Articles Track
The KB Articles Track stores self-help and reference materials.
Fields: Title, article content, keywords, and categories.
Relationship Fields: Can be linked to tickets or RMAs to assist with resolution.
Triggers: Optional automations can suggest articles when tickets match certain keywords.
Buttons: Quick access like "Attach to Ticket" or "Share with Client."
Spare Parts Track
The Spare Parts Track complements the Parts Track, focusing on depot-managed or reserved stock.
Fields: Includes location, part number, and available quantity.
Relationship Fields: Connects to depot locations and RMAs.
Triggers: Decrease inventory on part usage or reserve stock for specific RMAs.
Buttons: "Allocate to Unit" or "Transfer Between Depots."
Depot Locations Track
The Depot Locations Track manages service and repair centers.
Fields: Location name, address, operating hours, and assigned teams.
Relationship Fields: Associates depots with RMAs, units, and spare parts stored there.
Triggers: Automations can assign RMAs to depots based on geography.
Buttons: "Assign RMA to Depot" or "View Inventory."