Setting up an Email Action
Admins can set up predefined automatic emails that can be sent to various users based on triggers and custom button clicks. This action type allows us to structure the content and layout of the email. On top of that, emails have the flexibility to include attachments, links to different display views and field values within the email.
Configure an Email Action
Switch to Admin Interface.
Open the desired Track and it defaults to Fields page.
Click "Create New" to create a new field, or click "Clone" to duplicate an existing one and modify it as needed.
Provide a Name and Description for your action you are creating.
Select Email as the action type.
Checkbox Options
Disable action: Use this to temporarily deactivate the action without deleting it from the system.
Add email as comment: Enable this if you want the email content to be added as a comment.
Make Comment Private: If the email is added as a comment and you don't want client users to see it, enable this option.
.png)
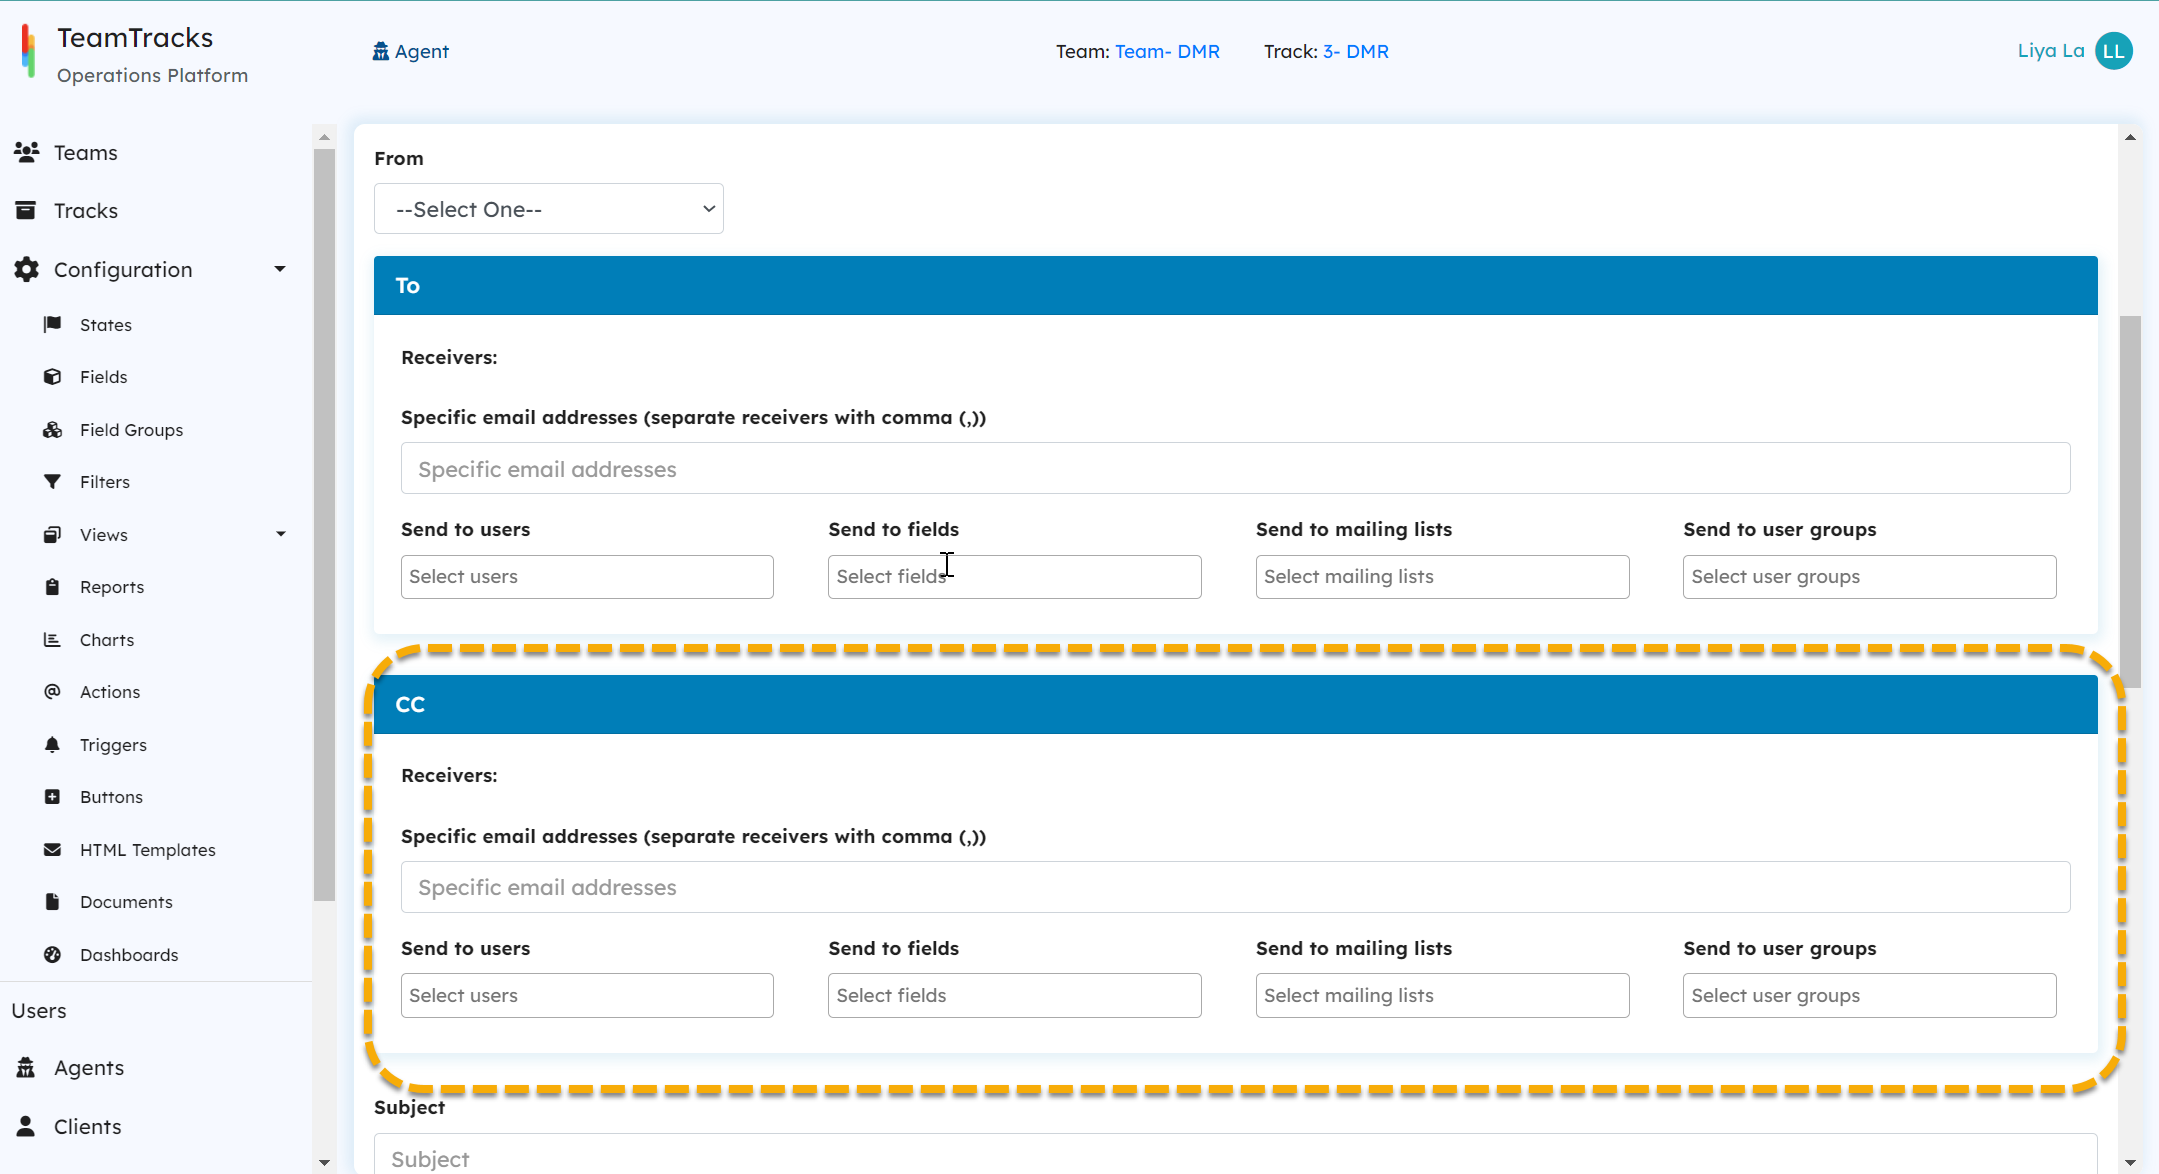
Email Header

Admin Portal: Create Email Action
# | Display Name | Description |
|---|---|---|
1 | From | A field for the the sender's email address. The emails can be sent to the recipients using either a default staff email address or the email address of the agent who performs the action. |
2 | Specific email addresses | Directly specify the email addresses of the recipients. Multiple email addresses can be included by separating them with comma (,). |
3 | Send to users | This field shows a list of users who are eligible to receive the email within the system. Select one or more users from the list to add them to the recipient list. |
4 | Send to fields | This a multi- choice field that displays a list of available field names that can be added to the recipient list. For example, field names can be used to send emails to the users for whom the object has been created ("Created for Email"), or to the user who changed the state of the object. A custom field that holds a valid email address can also be selected. |
5 | Send to mailing lists | Admins have the ability to define mail groups or lists which can be included in the recipient list under additional settings. This multi- choice field will display all the available mailing lists within the system. When a mailing list is added to the recipient list, the email will be received by all the addresses in the mailing list. |
6 | Send to user groups | Similar to the "Send to mailing list" feature, this multi- choice field presents the available user groups within the system. Admins can select one or more user groups from the list to include them as email recipients. |
In addition to the recipient list ("To"), the CC list can also be set up using the same set of fields.
Admin Portal: Create Email Action
Email Body
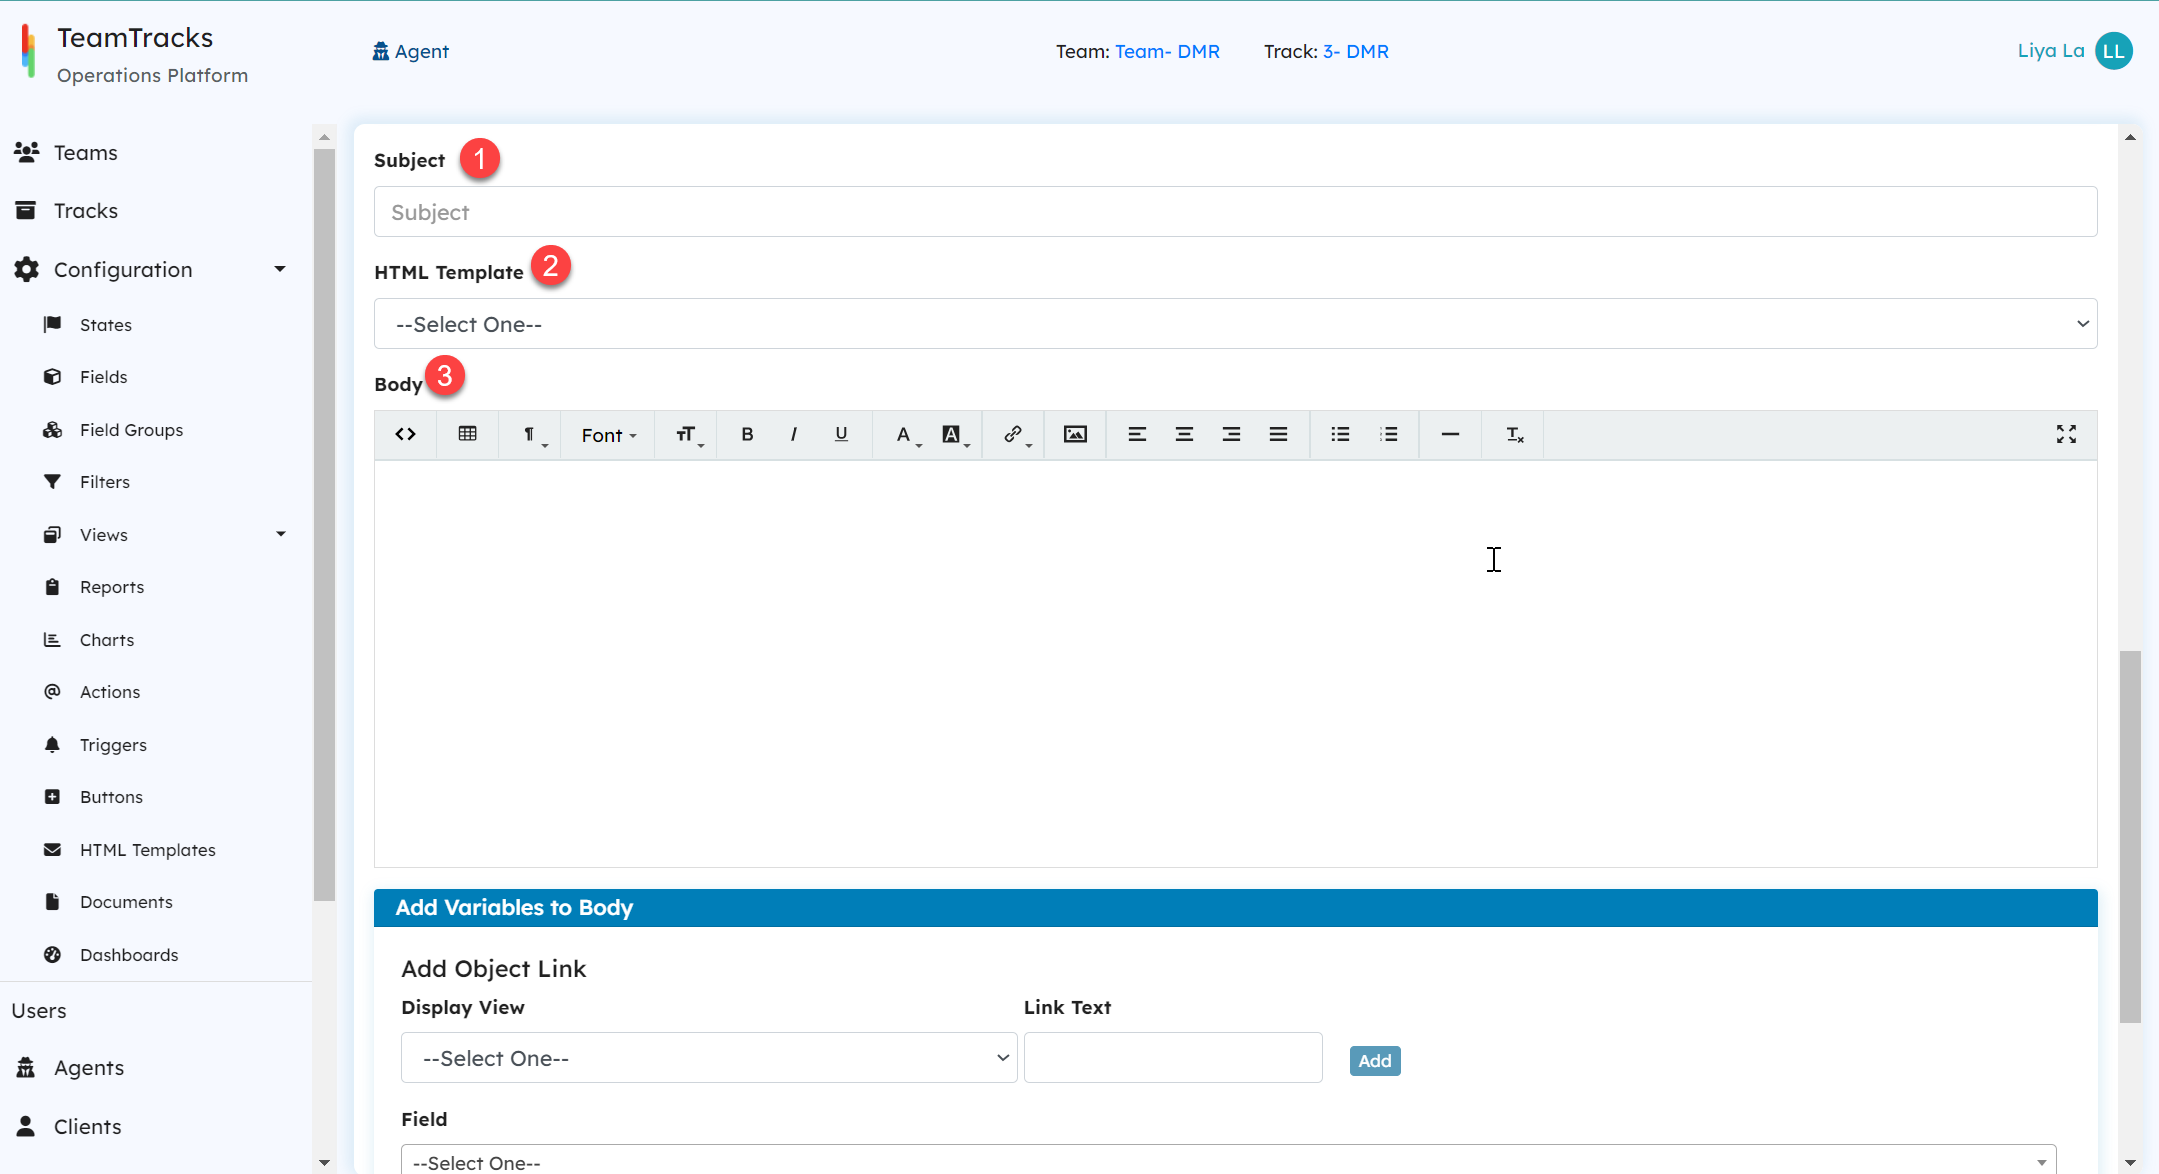
Admin Portal: Create Email Action
# | Display Name | Description |
|---|---|---|
1 | Subject | The subject refers to the headline or the title of the email. To make the subject line effective and concise, admins can use feature to include field values such as RMA or ticket number in the subject line. The system can save all the replies to the automated emails in the email history using the subject line. To make this work, please remember to add the unique code to the subject line. The code should follow this format: [Track Name: Object ID]. You have the flexibility to encode the track name using either the full track name or a short code that can be defined in the track settings(see image below). For example, if you have a ticket number 1234 in the track "Issue Log", the subject line should contain [Issue Log: 1234] or [Log: 1234]. 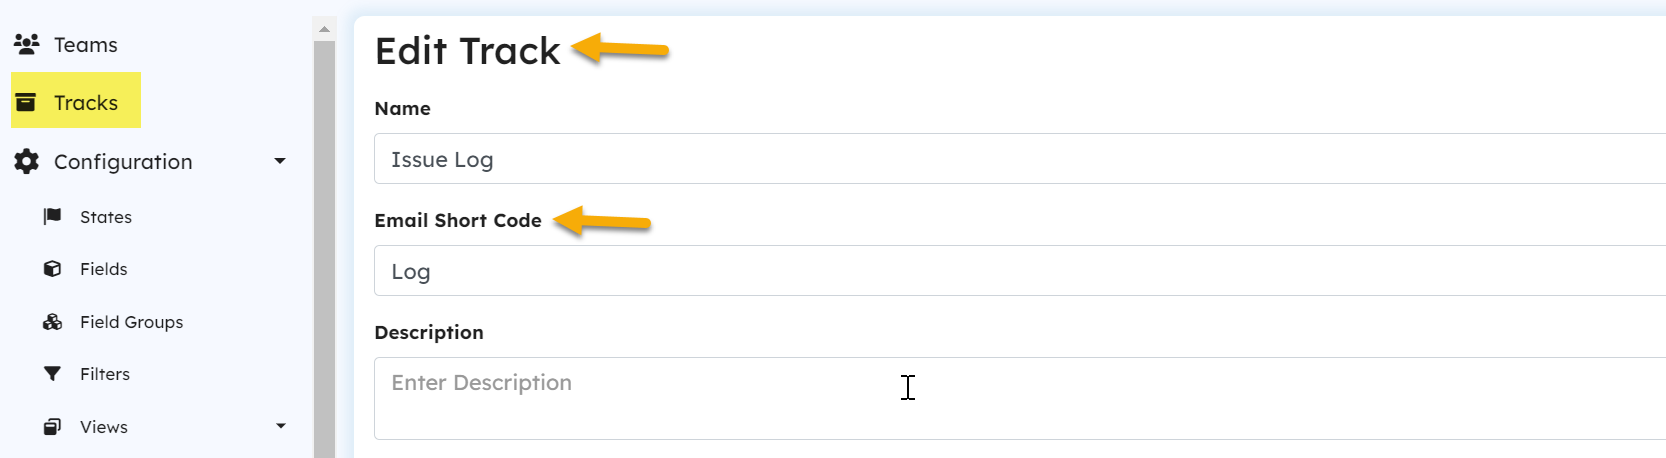 Admin Portal: Edit Track screen |
2 | HTML Template | Add one of your predefined HTML templates to the email using this feature. This dropdown will list all the HTML templates defined within the track. Once you select the template, it will be automatically added to the email body. |
3 | Body | This feature provides an HTML editor that allows you to manage and customize the email body content. The editor offers functionalities such as format text, insert tables, links and images, apply styling and much more. |
Other Attributes
In addition to the HTML editor, you can also customize your email using the below features.
Admin Portal: Create Action screen for email
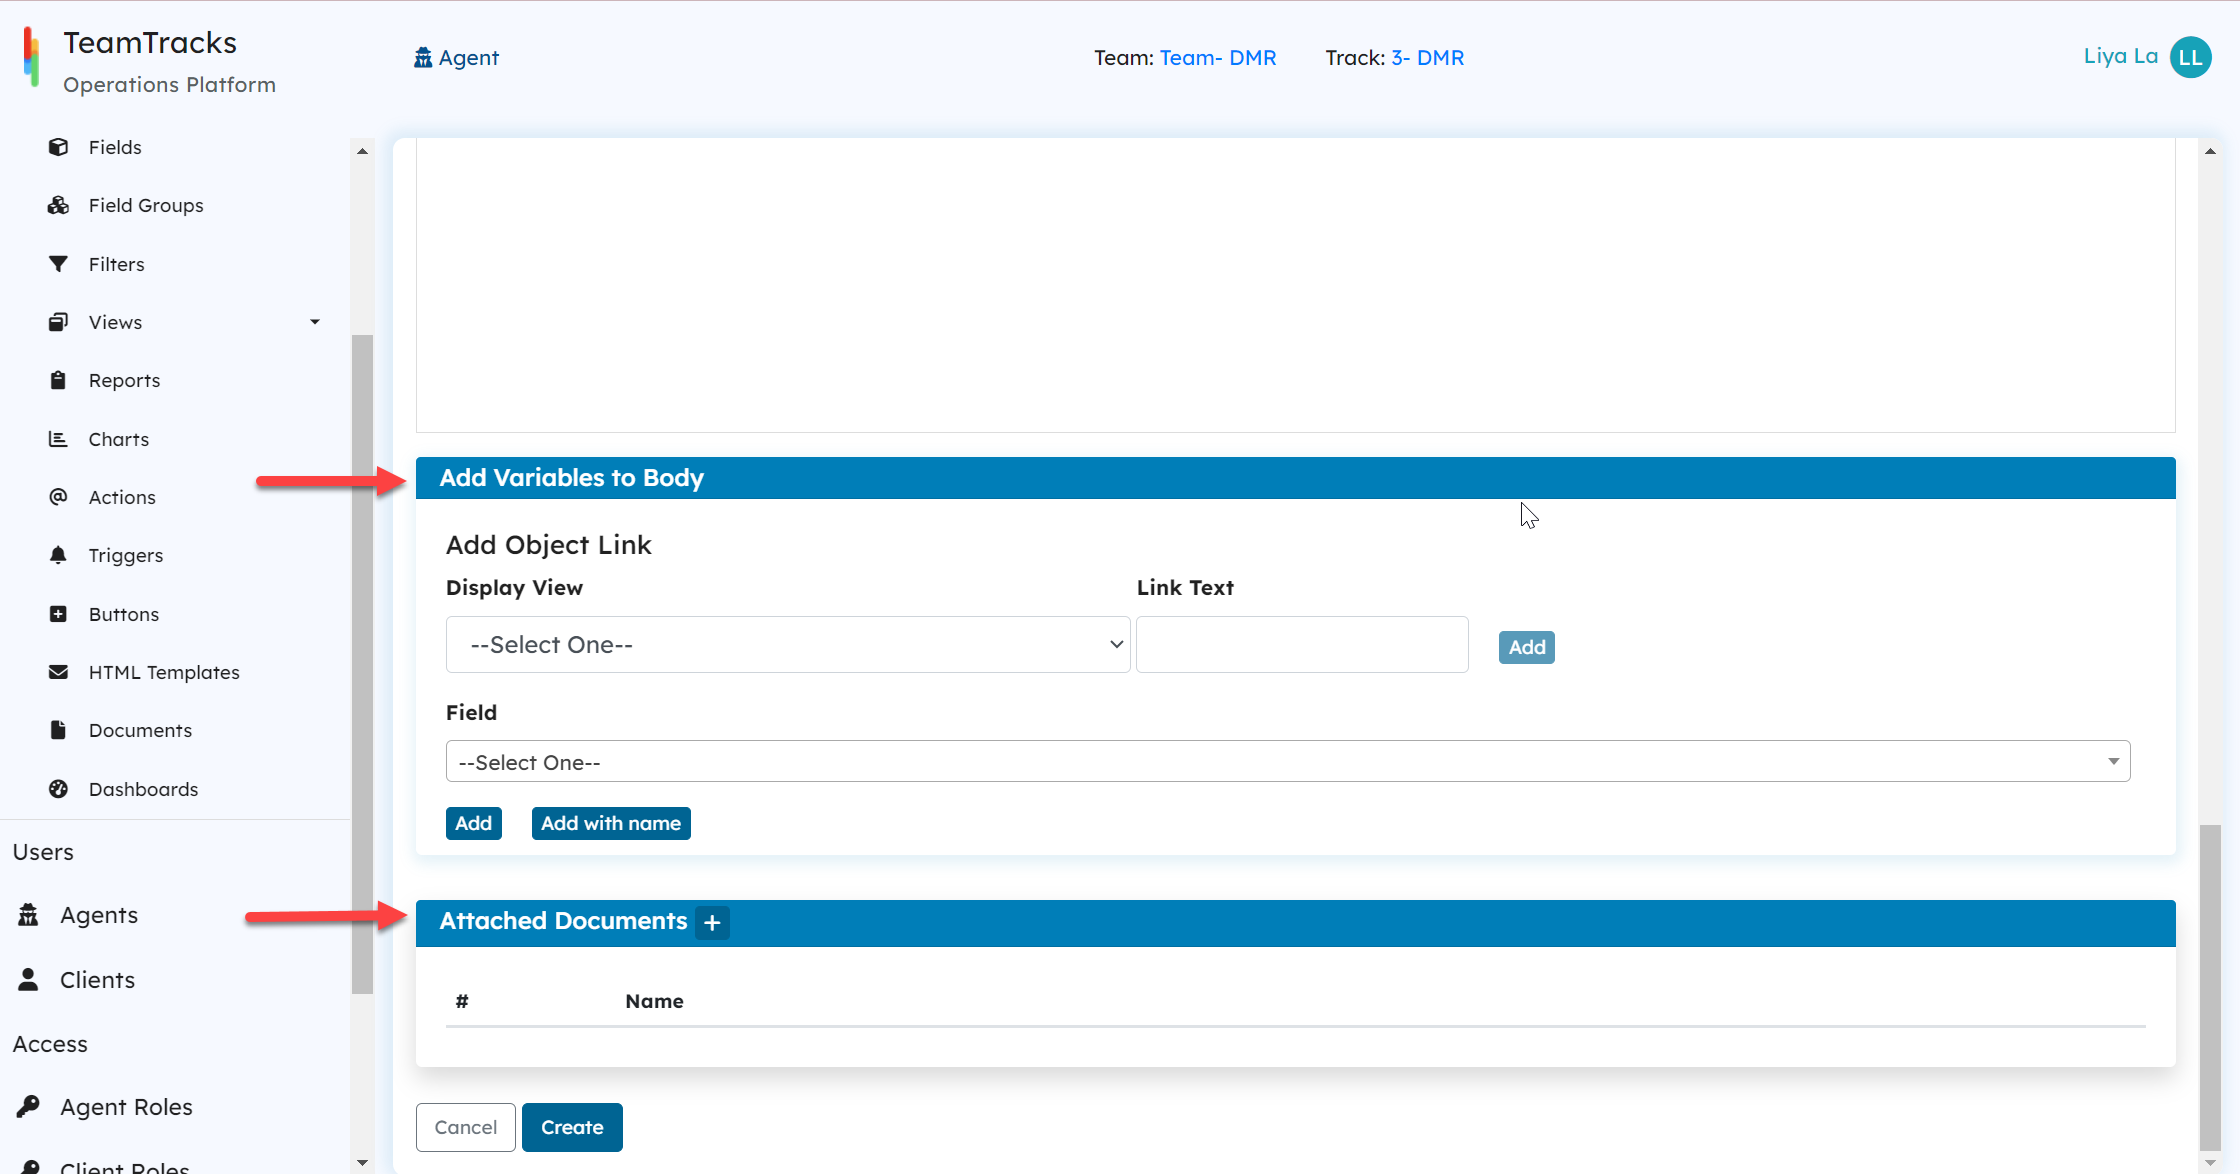
Add Variables to the Body
With this feature, you can insert display views and field values into the email content. For example, you can provide a link to the RMA information view page or field values such as RMA number, shipping address with or without field names.
To add a display view as a link
Click on the Display View Dropdown and select the desired view.
Enter the Link Text.
Click on Add button. The link will be added to the email body.
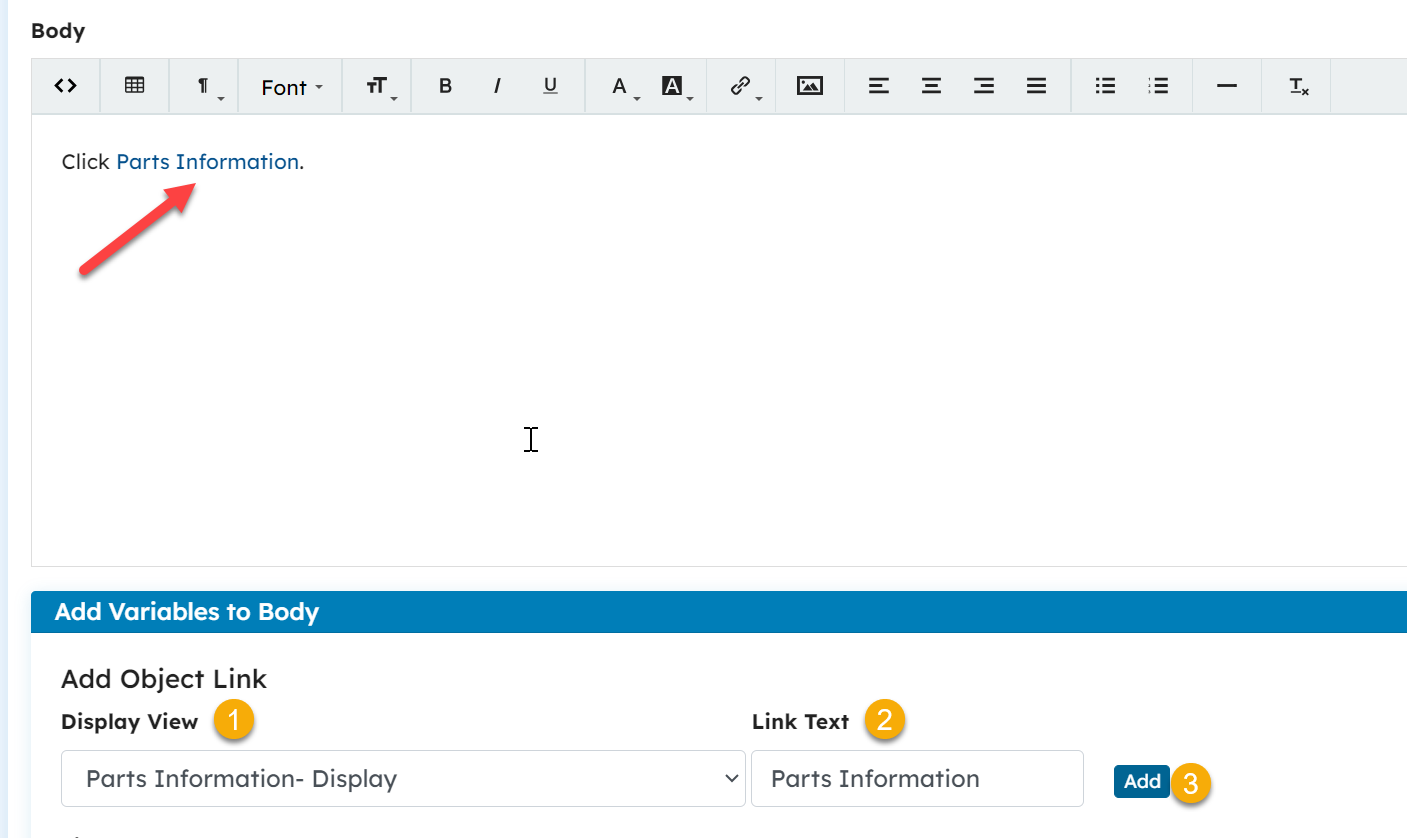
Admin Portal: Adding a view to the email body in create action screen
To add a field value
Select the Field from the dropdown.
Click on Add button to add the field value only.
Click on Add with name button to add the value along with field name.

Attached Documents
To add documents as attachments(screenshot below):
Click on the + icon.
Select the document to be added as attachment from the popup display.
Click on Add Selected button.
The selected document will display under the Attached Documents section.
Attached Reports
To add reports to email as attachments:
Click on the + icon next to Attached Reports.
Select the report to be added as attachment from the popup display.
Click on Add Selected button.
The selected report will display under the Attached Reports section. All reports are available to attach, regardless of track, ensuring flexibility in sharing data. Currently, this feature supports attachments in XLSX format.
.png)